


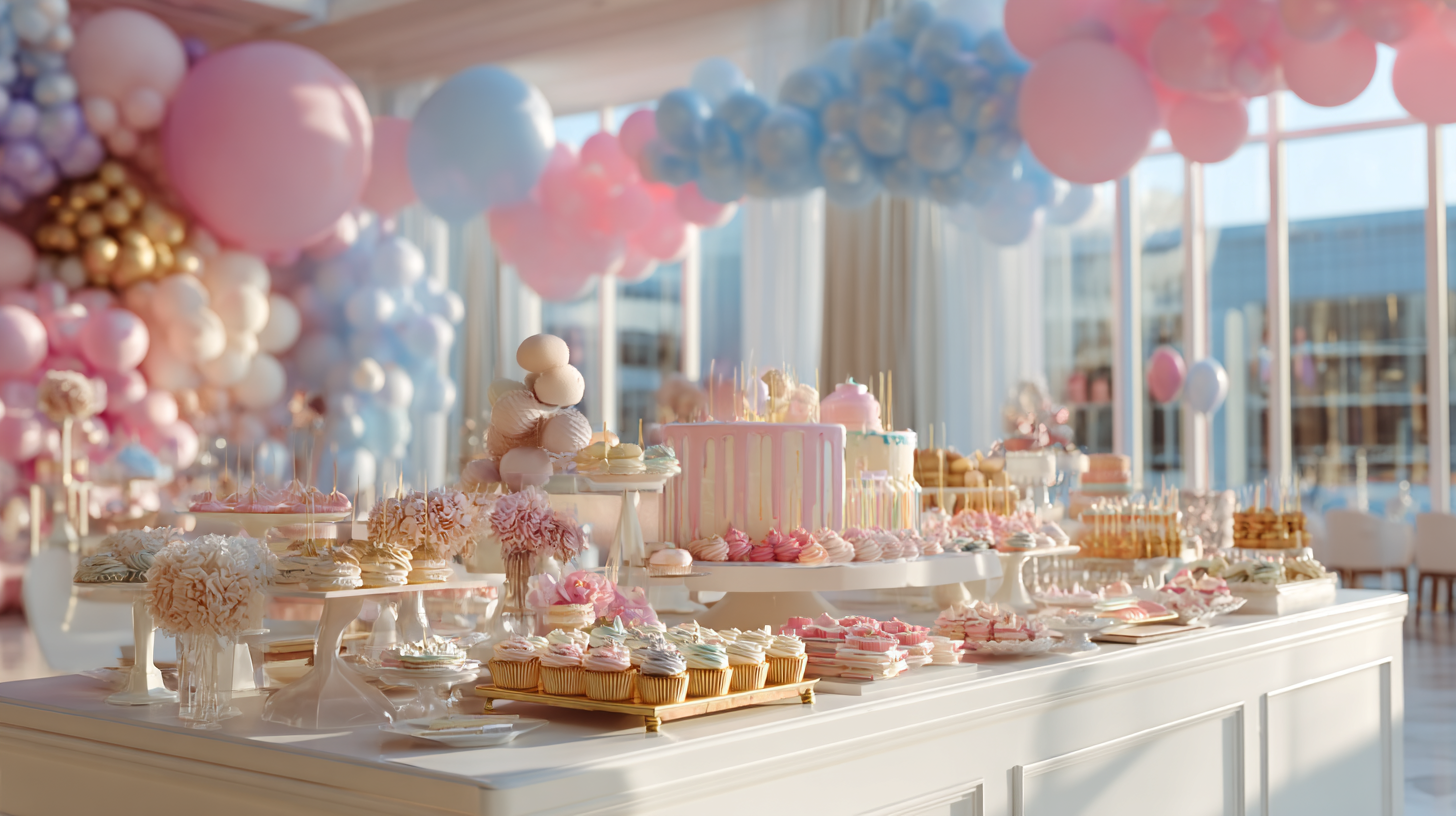
Cupcake Displays & Dessert Tables for Birthday Parties
You have spent hours choosing the perfect flavors, finding a specialty baker, or baking dozens of treats yourself until the frosting is swirled to perfection. But when you finally set that individual cupcake out on the dining room table, something feels flat. Instead of a centerpiece, they look like “mere snacks” lost on a crowded platter.
This is the common struggle of the “Presentation Gap”—where expensive, custom treats look underwhelming because they were left in plastic shells or spread across a boring, level surface.
The secret to that “wow” factor isn’t a professional stylist’s budget; it is the power of a professional display. By understanding how the human eye moves across a table and utilizing simple design principles like height and hierarchy, you can transform everyday treats into a stunning visual feast. Whether you are planning a milestone birthday or just trying to fit two dozen desserts into a small footprint, this guide will walk you through the art of turning a simple cupcake into an unforgettable event.
The visual presentation creates anticipation. It tells your guests that this moment is special. It turns dessert into an event.
If you are reading this, you likely want your party to have that “wow” factor. Perhaps you have pinned dozens of dessert table images and want to know how to recreate that look without a professional stylist’s budget. Maybe you are planning a milestone birthday and want the photos to look amazing. Or maybe you just realized that twenty-four cupcakes take up a lot of table space and you need a plan.
From Simple Treats to Stunning Centerpieces
This guide is for you.
We started discussing party desserts in the hub post, Birthday Cakes and Cupcakes: The Complete Celebration Guide, covering the basics of serving and quantities. However, this pillar post goes much deeper. Here, I am pulling back the curtain on the design principles, construction techniques, and styling secrets that professionals use to build those breathtaking tables.
You will learn how to create height without risking disaster. You will understand how to balance visual weight so your table feels curated, not chaotic. I will walk you through building your own stands if buying one isn’t in the budget, and exactly how to arrange every single cupcake for maximum impact.
Let’s turn those delicious treats into a stunning visual feast.
The Design Principles Behind Stunning Cupcake Displays
Creating a professional-looking cupcake display isn’t about owning the most expensive crystal platters. It is about understanding how the human eye moves across a table. When a display looks “off,” it usually violates one of four core design principles: hierarchy, balance, color flow, or negative space. Once you understand these, you can make cardboard boxes look as good as porcelain stands.
Height and Visual Hierarchy
If there is only one rule you follow from this guide, make it this one: avoid the flat table.
A table where every platter, plate, and stand sits at the same level is visually boring. More importantly, it creates a “buffet line” feel rather than a focal point. Flat displays also force guests to reach over front items to get to back items, which risks sleeves dragging through frosting.
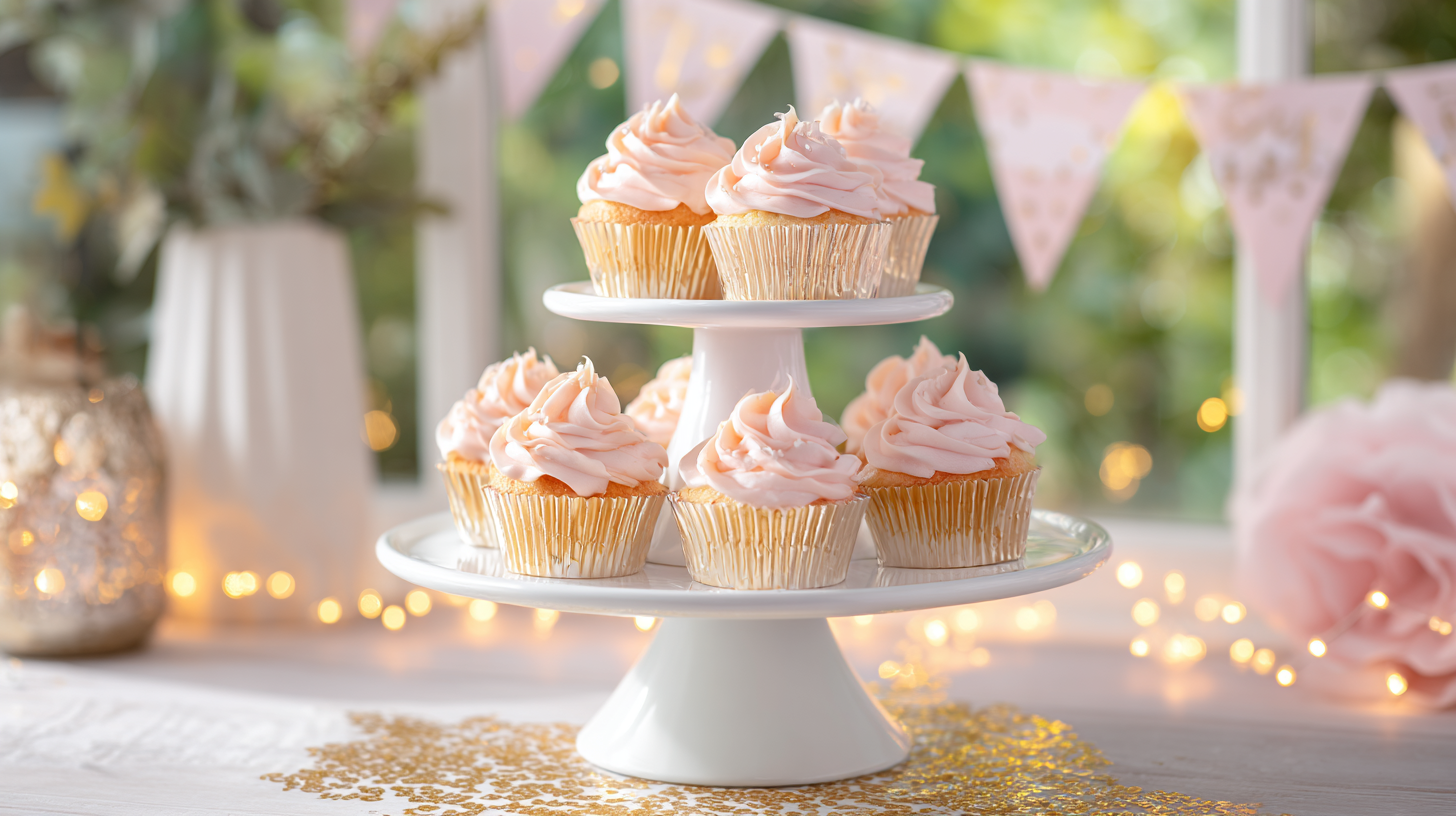
Height creates hierarchy. It tells the eye where to look first. This concept, known as visual hierarchy, is a foundational design principle that guides attention through deliberate arrangement of elements. Usually, this is your cake or your feature cupcakes. By elevating certain elements, you create a visual journey. The eye starts at the highest point and travels downward to explore the rest of the table.
Furthermore, height maximizes table real estate. By building up, you fit more desserts into a smaller footprint. This makes the display look abundant. Twenty cupcakes spread flat on a table look sparse. The same twenty cupcakes arranged on a three-tier stand look like a feast.
However, height requires strategy.
Place your tallest element either in the center (for 360-degree viewing) or at the back center (if the table is against a wall). Flank it with medium-height items, and place the lowest items at the front. This creates a triangle shape, which is naturally pleasing to the eye.
Practicality matters here too. Never place a display so high that it becomes unstable or that short guests (especially children at a birthday party) cannot reach it safely. A good rule of thumb is that the top tier should be no higher than eye level for an average adult, and lower if kids are serving themselves.
Visual Weight and Balance
Balance does not always mean perfect symmetry. In fact, perfectly symmetrical displays can sometimes feel stiff or formal. Instead, think about visual weight.
Large, dark, or heavily decorated items carry more visual weight. They feel “heavy” to the eye. Small, light-colored, or simple items feel “light.”
To balance a cupcake display, you want to distribute this weight evenly. If you put a massive tiered stand on the left side of the table and a single flat platter on the right, the table will feel like it is tipping over.
You can achieve balance in two ways:
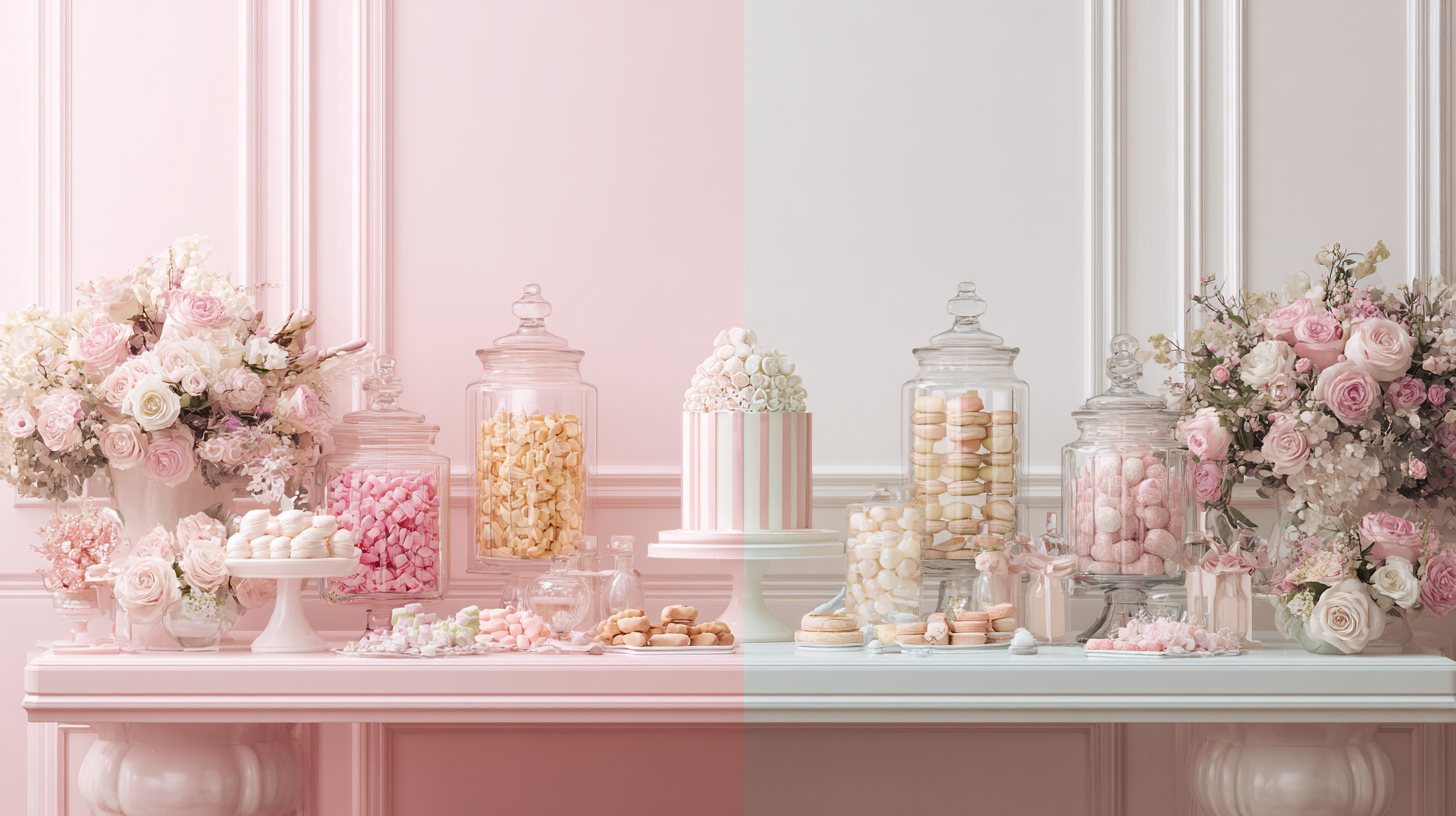
- Symmetrical Balance: This is the easiest method. Imagine a line down the center of your table. Whatever you put on the left, you mirror on the right. If you have a jar of candies on one side, place an identical jar on the other. This creates a calm, orderly, and traditional look.
- Asymmetrical Balance: This is more dynamic and modern. You balance a heavy item on one side with a grouping of lighter items on the other. For example, a tall cupcake tower on the left might be balanced by a lower cake stand and a vase of flowers on the right. The visual “weight” is equal, even if the objects are different.
Common mistakes include top-heavy displays, where a small base supports a wide top tier. This looks precarious and makes guests nervous to take a cupcake. Always anchor your display with a solid, visually heavy base.
Color Coordination and Flow
Your display design extends far beyond the frosting. The stands, the tablecloth, the backdrop, and the napkins all contribute to the color story.
Color flow helps the eye navigate the table. If your cupcakes are bright pink, but your stands are bright blue and your tablecloth is patterned red, the viewer doesn’t know where to look. The visual noise is overwhelming.
Stick to a cohesive palette. I recommend choosing neutral bases for your display hardware—white, glass, wood, or metallic silver/gold. These allow the cupcake colors to be the star. If you want colorful stands, ensure they match exactly with the party theme colors.
Consider the “60-30-10” rule, a time-tested principle from interior design that House Beautiful explains in depth.
- 60% of the table (usually the cloth and backdrop) should be a dominant color.
- 30% (often the stands and larger décor) should be a secondary color.
- 10% (the cupcakes and small accents) should be the accent color.
Also, watch for clashing undertones. A cream-colored buttercream looks dirty next to a stark white plastic stand. A cool-toned purple tablecloth might clash with warm-toned red velvet cupcakes. Holding your liners and decorations against your serving ware in daylight before the party saves you from day-of disappointments.
Negative Space and Breathing Room
There is a temptation to fill every square inch of a dessert table to make it look “bountiful.” Resist this urge.
Crowded displays look chaotic. They also make it difficult for guests to serve themselves without knocking things over. You need negative space—empty areas on the table—to let the design breathe.
Negative space frames the desserts. It allows the eye to rest between focal points. If you have a beautiful tiered stand, leave a few inches of clear table space around its base before placing the next platter. This separation highlights the stand’s shape.
On the stands themselves, don’t cram cupcakes until they touch (unless you are doing a specific pull-apart cake design). Leave a finger’s width of space between each cupcake wrapper. This makes each treat distinct and easier to grab without smudging the frosting of its neighbor.
Scale matters here. For a small, intimate gathering, tight clusters feel cozy. For a large hall, you need more negative space to spread the display out so it commands attention in the larger room.
Cupcake Display Stands: Every Option from Budget to Splurge
The hardware you choose determines the structure of your presentation. You do not need to spend a fortune, but you do need to choose the right tool for the job. From classic tiered options to creative DIY solutions, here is how to choose the right foundation for your sweets.
Tiered Cupcake Stands — The Classic Choice
When most people think of a cupcake display, they picture the classic tiered tower. It is the most efficient way to serve a large volume of cupcakes in a small footprint.
Variations and Capacity:
- 3-Tier Stands: Typically hold 12 to 24 standard cupcakes. Perfect for small home parties.
- 4-Tier Stands: Usually hold 30 to 40 cupcakes. Good for standard class sizes or larger family gatherings.
- 5+ Tiers: Can hold 50 to 100+ cupcakes. These are massive and usually require a sturdy, professional base.
Material Matters:
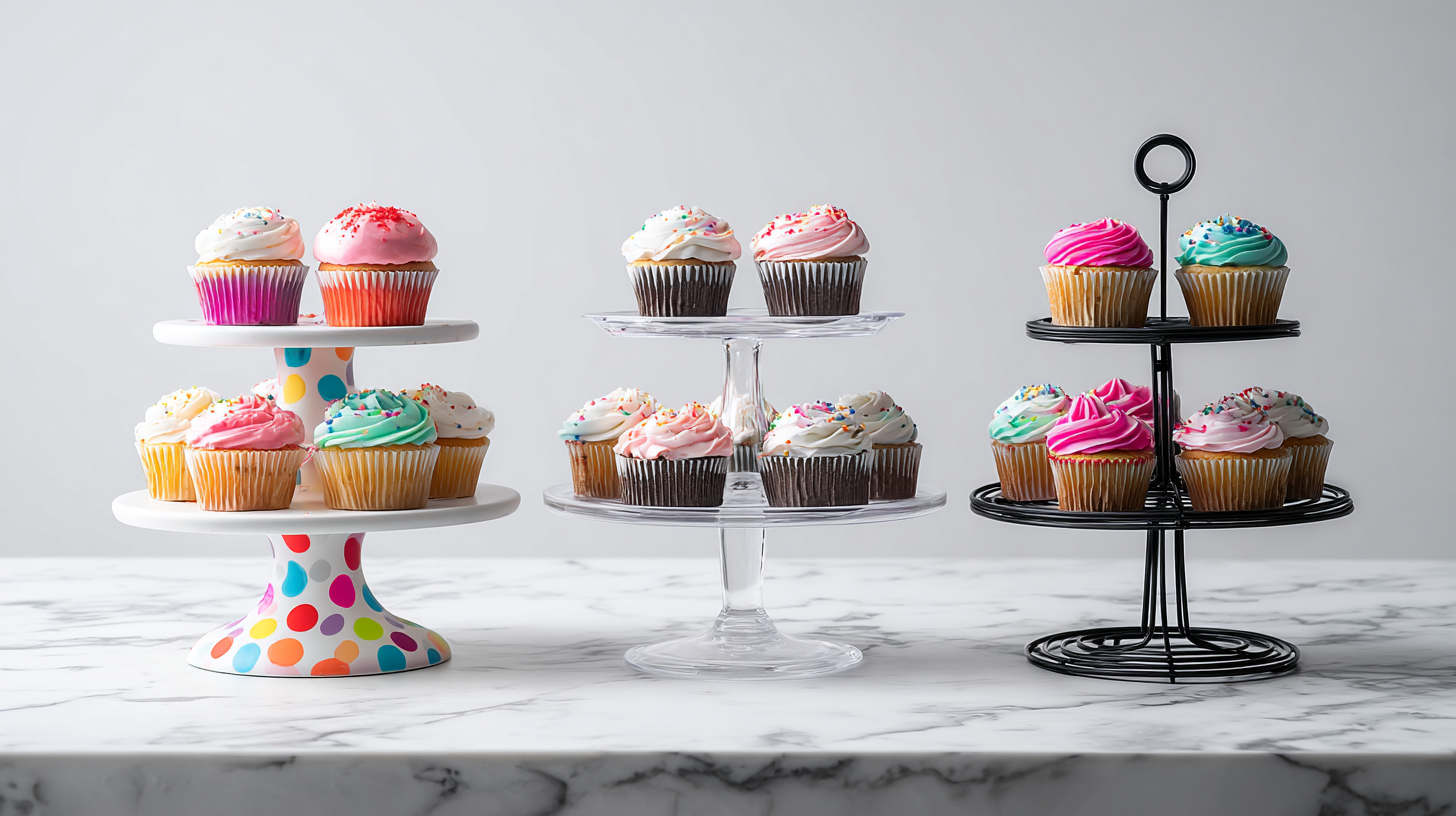
- Cardboard: These are inexpensive and widely available at party stores. They come in every theme imaginable. However, they are lightweight and can wobble if guests grab cupcakes aggressively. They are also strictly single-use if any frosting gets on them. Use these for casual kids’ parties where cleanup speed is the priority.
- Acrylic: A clear acrylic stand is a fantastic investment. It matches every theme because it is invisible. It is sturdy, washable, and reusable for years. If you host more than one party a year, buy one of these.
- Metal/Wire: These often have individual holders for each cupcake. They offer great stability and a decorative look (like a Ferris wheel or a tree). The downside is that they have a fixed capacity—you cannot squeeze in “one extra” cupcake.
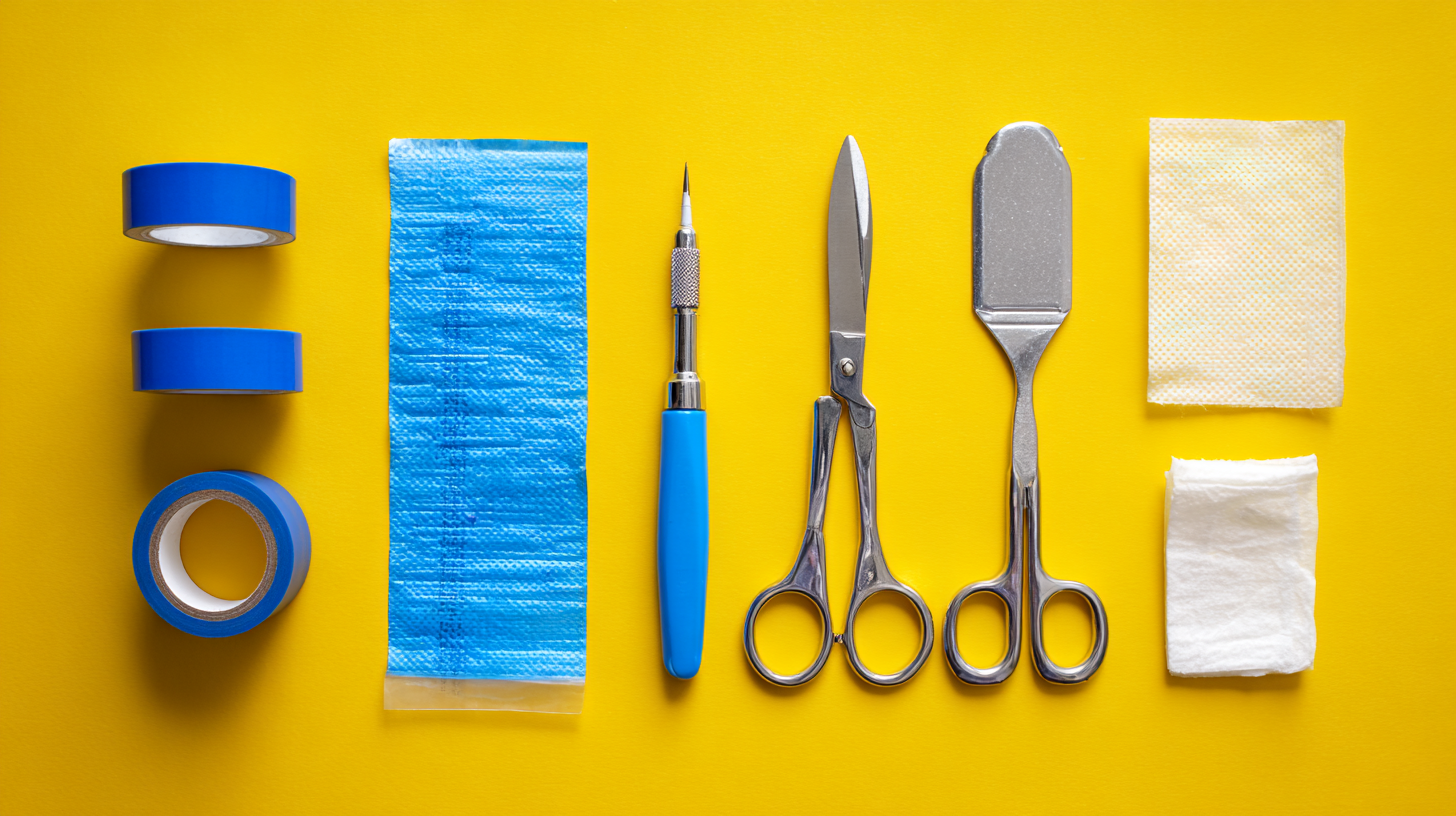
Insider Tip: If you use a cardboard stand, tape the base to the table with a loop of painter’s tape or use a small weight hidden inside the bottom tier. This prevents the whole tower from tipping if someone bumps the table.
DIY Display Solutions That Actually Work
You might already have everything you need to build a professional display in your kitchen or recycling bin. DIY stands allow you to customize heights and colors perfectly.
The Cake Stand Stack: This is my favorite trick. Take a large dinner plate and place it on a sturdy overturned bowl. Then, take a salad plate and place it on a smaller overturned cup on top of the first plate. Secure everything with museum putty or strong double-sided tape. You suddenly have a custom tiered stand using your own china.
The Box-and-Cover Technique: This creates a clean, geometric look often seen in retail displays.
- Collect sturdy cardboard boxes of varying sizes (shoe boxes, shipping cubes).
- Tape them shut securely.
- Wrap them tightly in high-quality wrapping paper or fabric that matches your theme.
- Stack them or arrange them side-by-side at different heights to create podiums for your cupcakes. Crucial: Use heavy paper. Thin tissue paper will tear and show the box markings underneath, which looks messy.
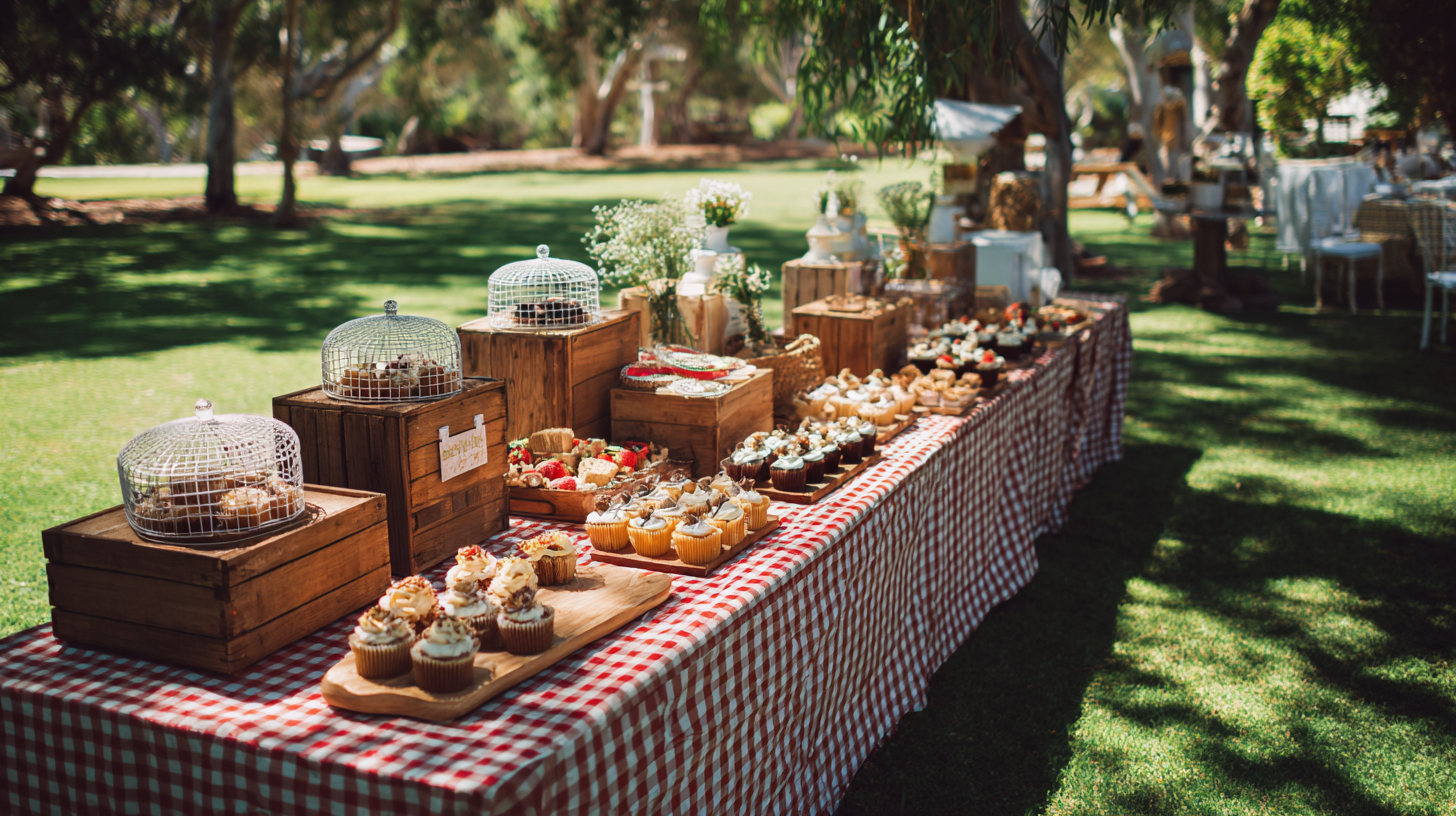
Rustic Crates and Boards: For a farmhouse or outdoor theme, wooden crates are invaluable. Flip a crate over to create a riser. Place a clean wooden plank across two crates to create a bridge or shelf. This provides massive surface area and great stability. Just ensure the wood is sanded or covered with a runner to avoid splinters near the food.
Beyond the Tower: Cupcake Walls, Spreads & Themed Displays
Sometimes the best stand isn’t a stand at all.
Cupcake Walls: This is a huge trend for weddings that has trickled down to birthday parties. It involves a vertical board with pegs or shelves holding the cupcakes. It doubles as a photo backdrop. While visually stunning, it requires significant construction skill to ensure the pegs don’t drop the cupcakes.
The Dessert Spread: Instead of one tall tower, spread the cupcakes across 4-5 different platters and low cake stands. This encourages movement along the table. It is less dramatic than a tower but friendlier for guests, as no one has to reach high or low. It works beautifully for a “grazing table” aesthetic.
Themed Objects: I have used a clean, new toy dump truck to hold cupcakes for a construction party. I have used a vintage suitcase (lined with food-safe paper) for a travel theme. Look at your party theme and ask: “What creates a flat surface?” If it is stable and can be made food-safe, it can be a display.
Where to Buy Cupcake Stands: Dollar Store to Professional Rentals
You can spend $5 or $500 on a display. Here is where to look.
Budget (Under $20):
- Dollar Stores: Great for plastic platters and foam blocks you can wrap for risers.
- Craft Stores: Look in the unfinished wood section for crates and rounds you can paint yourself. Use coupons!
- Party Supply Chains: Best for the disposable cardboard themed stands.
Mid-Range ($20 – $60):
- Home Goods/TJ Maxx: My go-to for ceramic cake stands and unique platters. Inventory changes weekly, so buy it when you see it.
- Amazon: The best source for standard acrylic tiered stands. Read reviews to check for stability issues.
- IKEA: Excellent for simple, modern serving ware that looks more expensive than it is.
Splurge/Professional ($60+):
- Specialty Bakeware Sites: Brands like Amalfi or Mosser Glass sell heirloom-quality stands.
- Rentals: For a major milestone (like a Sweet 16 or 50th), renting high-end silver or gold stands from an event rental company is often cheaper than buying them, and you get access to professional-grade heavy hardware.
Creating a Complete Birthday Dessert Table: Step-by-Step Setup
A cupcake display does not exist in a vacuum. It lives on a table, in a room, surrounded by other elements. Constructing the full dessert table environment is what separates a snack station from a styling moment.
Table Selection and Backdrop Planning
Start with the location. Do not shove the dessert table into a dark corner.
Choose a spot with good lighting, but avoid direct sunlight if your cupcakes have buttercream frosting (they will melt). High-traffic areas are risky; you don’t want guests bumping the table as they squeeze by. A spot against a wall is usually safest and easiest to style because it gives you a defined “back.”
The Backdrop: The wall behind your table is part of the display. If you have a gorgeous brick wall or a hedge, great. If you have a kitchen counter with messy outlets, you need a backdrop.
- Easy: Tape streamers vertically from ceiling to floor.
- Medium: A printable vinyl banner customized for the birthday.
- Pro: A pipe-and-drape system (or a curtain rod between two tall lamps) with fabric.
The backdrop frames the table. It creates a border that says, “Look here.”
Table Size: A common mistake is using a table that is too big. If you have 24 cupcakes and a 6-foot banquet table, the display will look sad and empty. Use a smaller table (like a card table or a console table) to make the display feel full and abundant. If you must use a large table, cluster everything in the center and use the ends for gifts or drinks, visually separating the zones.
Table Covering and Surface Preparation
The tablecloth is your foundation. A standard plastic party store tablecloth is functional, but it often looks sheer and wrinkles easily.
Upgrade your base:
- Layering: Place a solid color cloth down first, then layer a runner down the center. This adds texture and color.
- Texture: Use materials that catch the light. A sequin tablecloth for a glam party, a burlap runner for a rustic theme, or a butcher paper runner for an art party where kids can draw on the table.
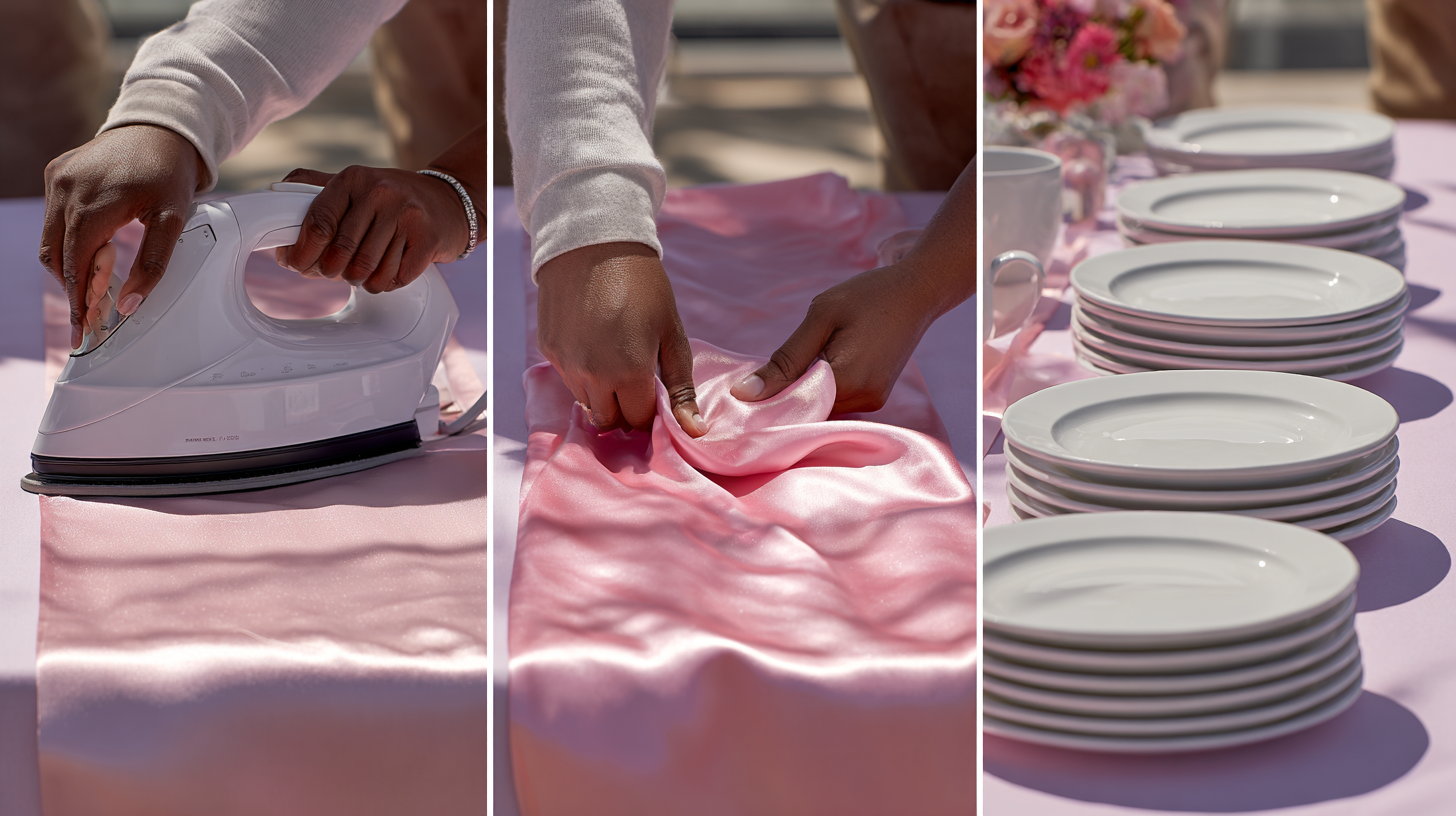
- The Iron: I cannot stress this enough. Iron or steam your fabric tablecloths. Deep fold creases scream “I just took this out of the package.” A smooth cloth looks instantly high-end.
Surface Protection: If you are using a wooden dining table without a full cloth, ensure you have coasters or trivets under anything warm or potentially moist. However, for cupcakes, the bigger concern is stability. If your table has a wobble, fix it with a shim under the leg before you start stacking cupcakes.
Arranging Elements for Visual Impact
Now, the actual construction begins. Do this before you bring out a single cupcake.
- Anchor First: Place your largest, tallest stand. Usually, this goes in the back center. This is your “Mountain Peak.”
- Secondary Heights: Place your medium stands. If you have the Mountain Peak in the center, place medium items to the left and right, slightly forward.
- Low Trays: Place flat platters or trays in the front foreground.
- The Step Back: Step back five feet. Look at the arrangement. Does it look balanced? Is there a weird gap?
- Fillers: Once the main structure is set, add your decorative fillers. This could be jars of candy, framed photos of the birthday person, or vases of flowers. Place these in the “negative space” gaps you identified.
Insider Tip: Use “dummy” objects to test your layout days in advance. Use cereal boxes or bowls to represent your stands. This lets you figure out if everything fits without stressing on party day.
Common Setup Mistakes and How to Avoid Them
Even with the best plan, things can go wrong. Watch out for these traps:
- The “Chin Height” Barrier: Don’t put tall floral arrangements or displays right at the front edge of the table. They block the view of everything behind them. Keep tall items in the back.
- The Color Clash: I once saw a beautiful pastel mermaid display ruined because the host put bright red soda bottles right on the same table. Keep the dessert table for desserts. Put drinks and savory food on a separate station to preserve the color palette.
- The Reach: Don’t put the most popular flavor on a high tier at the back where kids have to climb over the table to get it. Put the kid-friendly options low and front.
- Wind: If you are outdoors, cardboard stands are kites waiting to fly. Weigh them down heavily or stick to heavy ceramic/wood platters.
How to Arrange Cupcakes for Maximum Visual Impact
The stands are set. The table is dressed. Now comes the moment of truth: placing the cupcakes. How you orient the cupcakes on the stand changes the vibe of the entire display.
Pattern Arrangements — When Order Creates Impact
For modern, geometric, or formal themes, precision is key. You want the display to look engineered.
The Grid: On rectangular platters, line up cupcakes in perfect soldier rows. Ensure the frosting swirls are all oriented the same way. This looks incredibly satisfying and clean.
The Concentric Circle: On round tiers, arrange cupcakes in perfect rings. Start from the outer edge and work in. If you have different flavors, make each ring a distinct flavor/color. This creates a bullseye effect that is very striking from above or at eye level.
The Gradient (Ombre): If you have cupcakes in varying shades of the same color (e.g., light pink to dark magenta), arrange them to create a fade. You can fade from top to bottom on a tower (lightest on top) or left to right on a table. This is a high-impact styling technique that requires zero extra money, just planning.
See our guide on Cupcakes for Birthday Parties: Planning, Scaling, and Presentation for more on baking specifically for these visual effects.
Organic Arrangements — When Natural Flow Works Better
For boho, garden, rustic, or whimsical themes, rigid rows feel too stiff. You want “organized chaos.”
The Cluster: Instead of lines, group cupcakes in tight bunches of 3 or 5. Leave visible gaps between the clusters to show off the platter or table runner underneath.
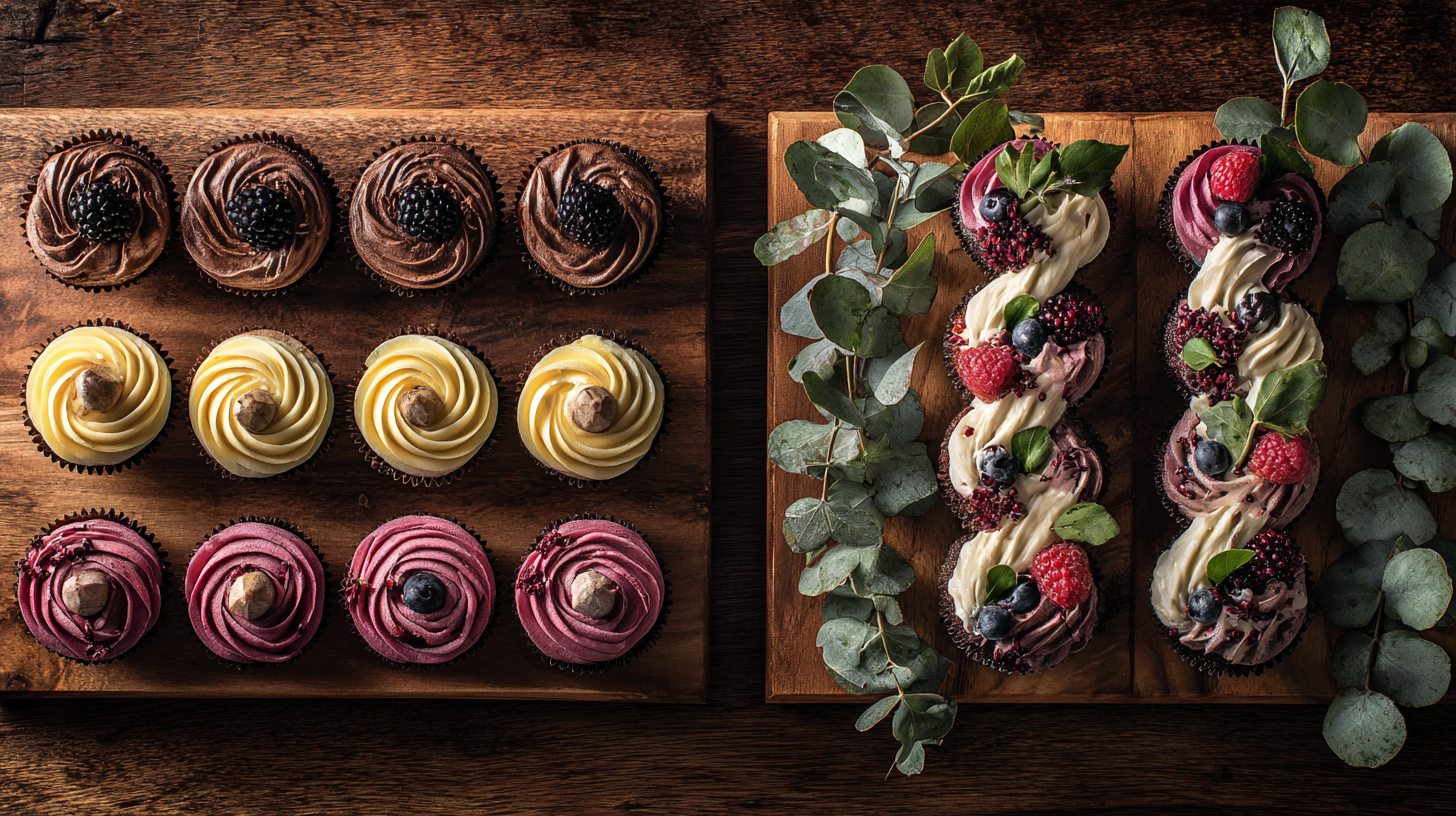
The Scatter: On a long table or a wooden board, scatter the cupcakes in a winding “S” curve rather than a straight line. Intersperse them with loose greenery, berries, or edible flowers. It looks lush and abundant, like a cornucopia.
Insider Tip: Even in organic arrangements, ensure the “front” of the cupcake (usually the best side of the swirl or where the topper faces) is pointing toward the guest.
Feature Cupcake Placement
Not all cupcakes are created equal. You might have “standard” cupcakes for the crowd and special “dietary” ones, or elaborate character cupcakes mixed with simple frosted ones.
The Hero Cupcake: If you have one cupcake that is extra special (maybe it has a candle for the birthday guest, or a massive fondant topper), place it at the absolute top of the tower or on its own mini pedestal in the center. It is the king of the castle.
Distributing Detail: If you have 12 highly detailed cupcakes and 24 simple ones, don’t clump all the fancy ones together. Distribute them evenly throughout the display. This trick makes the entire display look expensive and detailed, rather than having a “fancy section” and a “plain section.”
Multi-Flavor Display Organization
If you are serving Chocolate, Vanilla, and Red Velvet, you need a strategy.
Grouping by Flavor: This is the most user-friendly method. All chocolate on the bottom tier, all vanilla in the middle. It creates solid blocks of color.
Mixing for Visuals: If the colors complement each other (e.g., chocolate brown and strawberry pink), mixing them in a checkerboard or alternating pattern can look dynamic. However, you MUST label them. There is nothing worse than a guest biting into a flavor they hate because they couldn’t tell what it was.
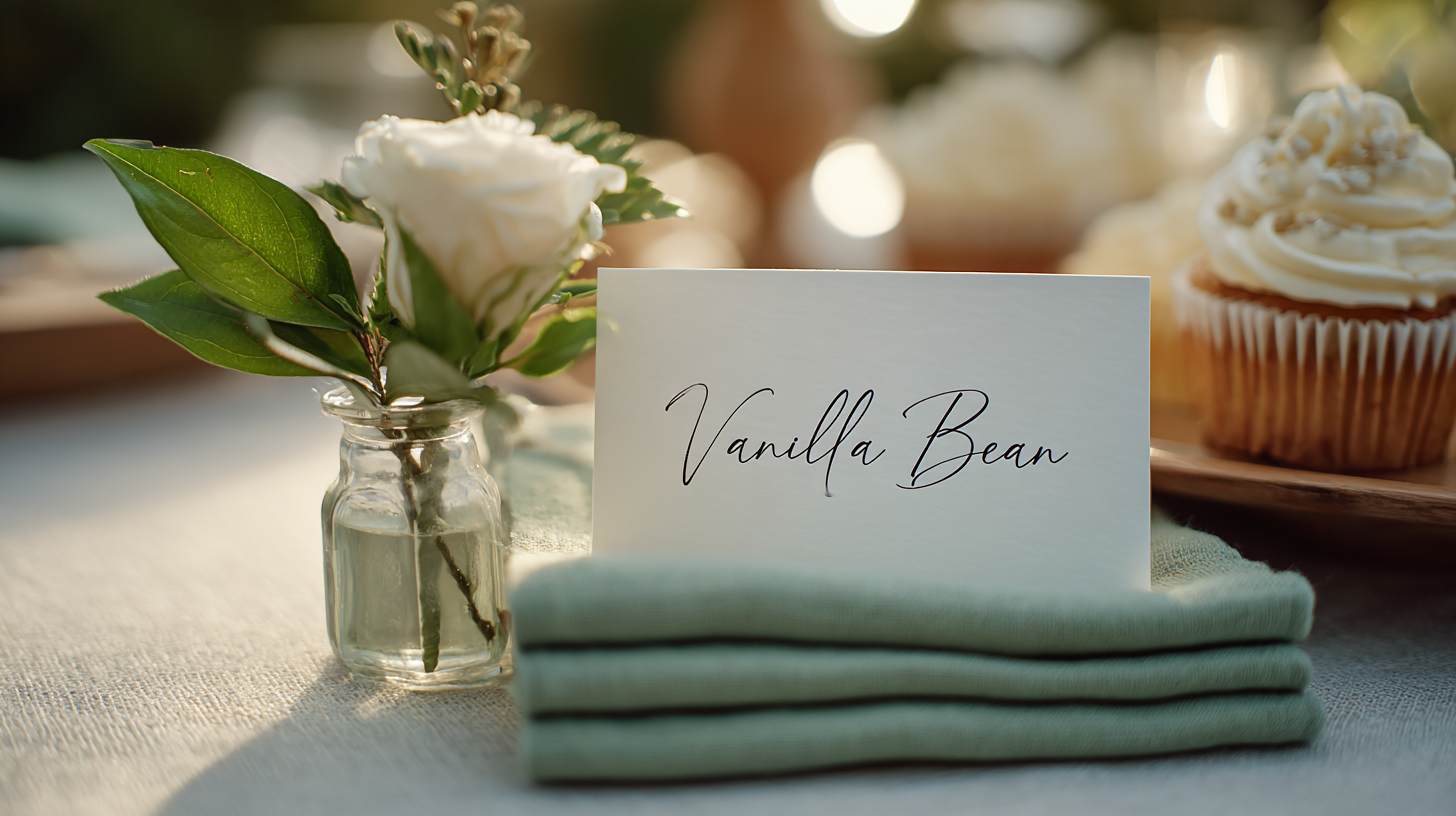
Labeling: Use small tent cards in front of each group. Or, for a cleaner look, use a framed menu on the table that lists the flavors and describes the toppings (e.g., “Vanilla Bean with Salted Caramel Drizzle”).
Properly arranged, your cupcakes serve as both the food and the decoration, tying the whole party theme together.
In Part 2, we will dive into the specific themes—from dinosaur jungles to elegant floral gardens—and exactly how to style your cupcake display to match them perfectly. We will also cover lighting techniques and photography tips to capture your creation forever.
Matching Cakes and Cupcakes to Birthday Party Themes creates a perfect transition to styling specific looks. Stay tuned for the next section where we get specific on themes!
Finishing Touches: Styling Your Cupcake Display Like a Professional
You have built the structure, baked (or bought) the treats, and set up the table. Now comes the fun part: styling. This is where a cupcake display transforms from a collection of stands into a cohesive design moment.
Styling is not about adding clutter. It is about adding context. Every accessory should serve a purpose, whether that purpose is functional (napkins) or aesthetic (color reinforcement). Here is how to accessorize without overdoing it.
Decorative Elements That Enhance Without Overwhelming
The line between “styled” and “cluttered” is thin. I always follow the “less is more” principle. The cupcakes are the stars; everything else is the supporting cast.
Fresh Flowers and Greenery: Living elements breathe life into a display. However, you must choose wisely. Avoid highly scented flowers like lilies, which can overpower the aroma of vanilla buttercream. Stick to sturdy blooms that won’t wilt after an hour without water.
- Good choices: Baby’s breath, seeded eucalyptus, succulents, or sturdy roses.
- Bad choices: Hydrangeas (they wilt instantly), delicate wildflowers, or anything sprayed with non-food-safe pesticides.
- Placement: Tuck small sprigs of greenery between cake stands to hide the bases. Use small bud vases to add height without bulk. Ensure no petals physically touch the icing unless they are edible and organic.
Themed Decor: Instead of scattering confetti everywhere (which looks messy and creates a cleanup nightmare), choose one or two impactful themed items. For a dinosaur party, a single high-quality T-Rex toy guarding the cupcake display looks better than fifty cheap plastic dinos scattered around. For a princess party, a framed vintage storybook illustration works better than plastic jewels.
Lighting: For evening parties, lighting is magical. Weaving micro-LED copper wire lights (fairy lights) around the base of your stands adds a warm glow that makes icing sparkle. Just ensure the battery packs are hidden under the table runner. Avoid real candles near the food—heat rises and melts frosting, and an open flame near paper napkins is a safety hazard.
Cupcake Flavor Labels & Dessert Table Signs That Look Professional
Your guests want to know what they are eating. I cannot tell you how many times I have seen guests poke a cupcake to see if it is lemon or vanilla. Save them the trouble with clear, stylish signage.
Flavor Identification: If you have multiple flavors, labels are mandatory. You don’t need a sign for every single cupcake. A single menu card in a frame listed “Today’s Flavors” works beautifully. Alternatively, use small tent cards placed in front of each flavor group.
Style Options:
- Chalkboard: Great for rustic or casual themes, but requires neat handwriting. Use a chalk marker, not stick chalk, for crisp lines.
- Printed Cards: Design simple cards in the Priey Design Studio using your party fonts. Print them on heavy cardstock.
- Letter Boards: These are trendy and reusable, perfect for a witty quote (“Life is Short, Eat the Cake”) or simple flavor lists.
Placement: Place signage where it doesn’t block the view of the treats. A tall sign should go in the back or off to the side. Low tent cards go right in front. Ensure the style of the sign matches the elegance of the display—a handwritten scrap of notebook paper will cheapen even the most expensive cake stand.
Styling Napkins, Plates & Utensils to Match Your Display
The functional items—plates, napkins, forks—are often treated as an afterthought. I treat them as a styling opportunity.
Napkins as Decor: Don’t just toss a plastic brick of napkins on the table. Fan them out in a spiral, place them in a nice basket, or weigh them down with a themed object. Choose a napkin color that pops against the tablecloth. If your cloth is white, use navy blue napkins for contrast.
Plates and Utensils: If your cupcakes are jumbo-sized or have messy fillings, guests need plates and forks. Stack small dessert plates neatly at the start of the table flow, not tucked behind the display. If you are using disposable forks, display them in a heavy jar or vase rather than lying flat on the table where they take up space.
Take-Home Containers: If you plan for guests to take cupcakes home, incorporate the boxes into the display. Stack clean, assembled favor boxes on a side riser. This adds height and signals to guests that leftovers are up for grabs later.
Theme Integration Through Styling Details
Your cupcake display is a storytelling device. Use accessories to reinforce the narrative.
For a beach theme, I have used a clean, new fishnet draped over a blue tablecloth under the stands. For a woodland theme, I have used clean wood slices as trivets for the platters.
Scale Matters: The accessories must scale with the desserts. A massive floral arrangement that towers over standard cupcakes makes the treats look tiny and insignificant. Keep decor elements slightly smaller or equal in scale to the cupcake towers.
The Cohesion Test: Before you finish, do the squint test. Squint your eyes and look at the table. Does any single object jump out because the color is wrong? Remove it. Cohesion creates that professional look. It is better to have a simple table where everything matches than a busy table with one clashing element.
Adapting Your Cupcake Display to Any Party Venue
I have set up displays in gourmet kitchens, windy parks, dark bowling alleys, and cramped office breakrooms. The environment dictates what is possible. You cannot fight the venue; you must adapt to it.
Setting Up Cupcake Displays in Your Home: Space & Traffic Flow
Hosting at home gives you control, but you also have to live in the space.
Furniture Limitations: You likely don’t have a commercial catering table. You are working with your dining table, a kitchen island, or a sideboard.
- Dining Table: Clear the chairs away. You want guests to walk up to the display, not sit at it.
- Sideboard/Buffet: This is ideal because it is usually against a wall. Just ensure you clear off the daily clutter (mail, keys, decorative bowls) completely. Don’t just push it to the side.
Background Noise: Home walls have life on them—family photos, light switches, thermostats. If these distract from your display, cover them. A temporary backdrop of fabric or a large piece of foam board wrapped in wrapping paper can mask a busy wall behind the dessert table.
Traffic Flow: In a home, the kitchen is the bottleneck. If possible, set the cupcake display in the dining room or living area to draw people out of the kitchen. Ensure there is room for two people to stand in front of the table without blocking the hallway.
Outdoor Cupcake Display Tips: Managing Wind, Heat & Insects
Outdoor parties are lovely, but nature is an uninvited guest. Wind, sun, and uneven ground are your enemies.
Wind Management: A light breeze will flip a paper plate or topple a cardboard cupcake stand instantly.
- Weights: Use heavy tablecloth clips or dedicated weights.
- Heavy Stands: Use ceramic, wood, or metal stands. Avoid lightweight plastic or cardboard.
- Low Profile: If it is very windy, skip the tall tower. Arrange cupcakes on low, heavy platters to keep the center of gravity down.
Sun and Heat: Direct sun will melt buttercream in minutes. Even in the shade, ambient heat can soften chocolate. According to FDA guidelines for outdoor food safety, perishable foods should not sit out for more than 2 hours—or just 1 hour when temperatures exceed 90°F.
- Shade: The display must be in full shade. If there is no tree, use a pop-up canopy.
- Timing: Keep cupcakes in a cooler or air-conditioned car until right before serving.
- Frosting: If you know it will be hot, use a shortening-based buttercream or a meringue frosting, which stand up to heat better than butter-based recipes. See Cupcakes for Birthday Parties: Planning, Scaling, and Presentation for recipe advice.
Insects: Sweet frosting attracts bees and flies. I use mesh food covers (domes) over the platters until the moment we sing “Happy Birthday.” It is not the most stylish look, but it is better than a fly on a cupcake.
Restaurant and Venue Party Displays
When you are on someone else’s turf, communication is key.
Coordination: Ask the venue manager exactly what is provided. Do they provide a table? Linens? Plates? often, a restaurant will give you a small section of a table. You need to know the dimensions. If they give you a 2-foot round table, your 3-foot long display plan won’t work.
Setup Timing: Venues often have strict access times. You might only have 15 minutes before guests arrive. Plan a “rapid deployment” display.
- Pre-assemble: Have stands built.
- Pre-plate: If possible, transport cupcakes already on the flat platters (securely covered).
- Minimal Decor: Skip the complex backdrop or confetti. Focus on a clean stand and a nice sign.
Cleanup: You are responsible for what you bring. Don’t leave a mess of wrappers and boxes. Bring a large trash bag and a box to pack up your stands.
Cupcake Displays for Offices, Classrooms & Picnics
Sometimes the party is in a weird spot.
Office/Classroom: Here, speed and hygiene are paramount. Individual cupcake boxes or covered containers are often preferred over open displays for germ concerns. If you do an open display, keep it compact and professional. Avoid glitter or confetti that the cleaning crew will hate.
Mobile/Picnic: If you have to walk 500 yards to a pavilion, you cannot carry a glass cake stand. Use high-quality, rigid disposable stands or lightweight melamine. Pack everything in a wagon. Your styling should be rustic and durable.
Creating Cupcake Displays That Photograph Beautifully
We live in a visual world. You want photos of your hard work, and your guests want photos to share. A few adjustments can make your cupcake display look like it belongs in a magazine.
Lighting Considerations for Display Photography
Photography is capturing light. If the light is bad, the photo is bad.
Natural Light is King: Whenever possible, position your table near a large window or glass door. As Adobe’s food photography guide notes, shooting through a window with diffused light—or even outdoors on an overcast day—often produces the most appetizing results. Natural light renders food colors accurately. Artificial overhead lights (especially fluorescent ones) cast a yellow or green tint that makes frosting look unappetizing.
Avoid Mixed Lighting: If you have nice window light, turn off the overhead bulbs. Mixing blue daylight with yellow bulb light creates weird shadows and colors that are hard to fix.
The Flash: Avoid using the flash on your phone or camera directly at the food. It flattens the image and creates harsh, ugly highlights on the frosting. Soft, diffused natural light is always best.
Background and Angle Planning
Step Back: The most common mistake is zooming in too close. You want to capture the whole scene. Step back so you can see the table legs, the backdrop, and the space around the display.
The Angles:
- Straight On: Best for showing off the symmetry and the backdrop. Crouch down so your lens is at eye level with the cupcakes, not looking down on them.
- Top Down (Flat Lay): Great for detailed shots of specific cupcakes or a “grazing table” layout, but less effective for tiered stands.
- 45-Degree Angle: The standard view. It shows dimension and depth.
Background Check: Look at what is behind the table in your frame. Is there a garbage can? A fire extinguisher? A pile of coats? Move them before you click.
The “Before” Photo Strategy
The “perfect” photo happens in a very specific window of time: after setup is complete, but before the first guest arrives.
The Checklist:
- Is the tablecloth straight?
- Are the labels facing the front?
- Are there any stray crumbs on the table? (Blow them off or use a piece of tape to pick them up).
- Are the cupcake toppers aligned?
Take your photos now. Once the party starts, the display will (hopefully) get destroyed by hungry guests. That messy, half-eaten table is a sign of a good party, but it makes for a bad photo.
How to Make Your Cupcake Display Instagram-Worthy
If you or the guest of honor loves Instagram, design for the square.
Color Pop: Bright, saturated colors perform better on small phone screens than subtle pastels.
The “Instagrammable” Moment: Create a focal point specifically for photos. Maybe it’s a specific sign or a “hero” cupcake with a sparkler. This encourages guests to snap and share.
Hashtags: If you have a party hashtag, put it on a small sign on the dessert table. This reminds guests to tag their photos so you can see them later.
When Cupcake Displays Go Wrong: Fixes and Prevention
I have had stands collapse, had frosting melt & I have had tables that wobbled like jelly. Panic helps nothing. Preparation helps everything.
Structural Failures — Tilting, Tipping, Collapsing
The Wobble: If you set up your stand and it leans, check the table first. Is the floor uneven? Use a shim (a folded piece of cardboard or a coaster) under the table leg to level it. If the stand itself is loose, tighten the center screw. I always keep a small screwdriver in my party kit for this reason.
The Heavy Side: Did you put all the cupcakes on one side of the tower while loading it? You might have unbalanced it. Always load tiered stands from the bottom up, working evenly around the circle.
Emergency Fix: If a tier cracks or breaks, remove it. Convert the display to a flat lay on the table. It is better to have a safe, flat display than a tall, dangerous one.
Protecting Cupcakes from Heat, Wind & Melting Frosting
The Melt: If you see frosting starting to droop or slide, you must act fast. Move the cupcakes to the coolest spot immediately (inside, into a fridge, or into a cooler). If they look messy, smooth them with a clean knife or spoon. You can pretend it is a “rustic” look.
The Wind: If gusts are blowing napkins away, anchor them. Place a full cupcake or a decorative rock on the napkin stack. If the tablecloth is blowing up onto the food, use strong tape to secure it to the underside of the table legs.
Aesthetic Problems Discovered Too Late
The “Sparse” Look: You set it up and realize you don’t have enough cupcakes to fill the stand. Do not leave gaping holes.
- Space them out: Increase the gap between cupcakes.
- Add filler: Use flowers, strawberries, or wrapped candies to fill the empty spots on the tiers.
- Remove a tier: Make the stand smaller so it looks full.
The Color Clash: The “pink” napkins you bought online are actually salmon, and they clash with your bubblegum pink frosting. Solution: Remove the napkins from the table. Put them at the drink station instead. Separation solves the clash.
Last-Minute Display Pivots
Sometimes, the plan just fails. The rental company forgot the stand. The table is half the size you expected.
The Pivot: Breathe. Look at what you have. Can you turn three cardboard boxes into risers? What about using the favor boxes as a display base? Can you arrange the cupcakes in the shape of the birthday number directly on the table surface?
Your guests do not know what the original plan was. They only see what is there. If you act confident, they will think this was the plan all along.
Keeping Your Cupcake Display Looking Good Throughout the Event
A dessert table has a lifecycle. It starts perfect, gets raided, and eventually needs to be retired. Managing this lifecycle keeps the party looking polished.
What to Do When Cupcakes Start Disappearing
As guests take cupcakes, the display can start to look like a picked-over carcass.
The Consolidate Move: About halfway through dessert time, walk by the table. If the bottom tier is empty and the top tier has three cupcakes, move the top ones down. Group the remaining cupcakes together on one platter. Remove the empty dirty platters. This makes the remaining food look appetizing rather than leftover.
Replenishment: If you have extra cupcakes in the kitchen, don’t put them all out at once. Refill the display as it empties. This strategy aligns with FDA buffet safety recommendations, which advise keeping backup dishes refrigerated and replacing serving platters with fresh ones rather than adding new food to existing dishes. This keeps the table looking fresh and abundant for late-arriving guests.
Keeping Your Dessert Table Clean During the Party
The Crumb Patrol: Kids (and adults) are messy. Every hour, do a quick sweep. Pick up discarded wrappers. Wipe up a smudge of chocolate on the tablecloth. Straighten the sign that got knocked over. These 30-second fixes keep the vibe high-end.
The Casualty: If a guest drops a cupcake or sticks their thumb in the frosting and puts it back (it happens!), remove that cupcake immediately. A damaged cupcake makes the whole batch look unappealing.
Knowing When to Stop Fussing Over the Display
Eventually, the party winds down. The display has done its job.
The Acceptance Point: Once the cake is cut and the main dessert rush is over, stop worrying. Let the table be messy. Let the kids grab the last few treats. You have the “before” photos. Now, enjoy your guests. The sign of a successful cupcake display is an empty table.
Creating Memorable Cupcake Displays for Every Birthday Celebration
You now possess the toolkit to transform a simple batch of cupcakes into a centerpiece that anchors your entire celebration. We have journeyed from the core design principles of height and balance to the practical realities of wind, wobbles, and lighting.
The gap between a grocery store tray and a stunning cupcake display isn’t usually money—it is intentionality. It is taking five minutes to iron the tablecloth and choosing a stand that fits your quantity. It is arranging the treats in a deliberate pattern rather than dumping them on a plate.
Remember, the goal is not to replicate a staged photo from a professional shoot that took eight hours to style. The goal is to make your guest of honor feel special and your guests feel welcomed. A DIY display made with love, cardboard boxes, and fresh flowers can be just as impactful as a rented crystal tower.
If you are planning a milestone event, lean into the drama of height and theme. If it is a casual family hang, focus on accessibility and abundance. You have the knowledge to calibrate your effort to the occasion.
Get creative And Have Fun!
Styling is a creative act. It is the final step in the baking process. So go ahead—stack those cake stands, place that greenery, and watch your guests’ eyes light up when they walk in the room.
For more on the baking side of things, check out Cupcakes for Birthday Parties: Planning, Scaling, and Presentation. And if you need help choosing the perfect flavor profile to match your theme, Matching Cakes and Cupcakes to Birthday Party Themes is your next stop.
Explore More: Dive into the full Birthday Cakes and Cupcakes: The Complete Celebration Guide for every aspect of your party dessert planning.
Join the Conversation: Have you ever saved a display disaster at the last minute? Or do you have a creative DIY stand idea? Tell me in the comments below! I love seeing how you solve these party puzzles.
🎁 Grab Your Free Party Toolkit
Don’t let a “sparse” look or a wobbly stand ruin your celebration. Subscribe to our newsletter to get instant, free access to our exclusive display planning sketches and styling checklists.
It’s like having a professional party planner in your pocket, helping you arrange every cupcake for maximum impact—absolutely free.
Frequently Asked Questions About Cupcake Displays
How far in advance can I set up a cupcake display?
You can set up the “hard” elements—table, cloth, backdrop, and empty stands—the day before or morning of the party. However, the cupcakes themselves should stay in their airtight containers until 1-2 hours before the event. If the room is warm or the frosting is delicate, wait until 30 minutes before. This prevents the cake from drying out and the frosting from getting crusty or dusty.
How do I keep cupcakes from falling off tiered stands?
This is a common fear! First, ensure your stand is on a level table. Second, don’t overcrowd the tiers; cupcakes should sit flat, not hang over the edge. If your stand has slick acrylic or glass shelves, you can place a small dab of stiff buttercream or a tiny loop of tape under each cupcake wrapper to “glue” it in place. This is especially helpful if the table might get bumped.
What’s the best backdrop for a cupcake display?
The most versatile backdrop is a clean wall or a solid-colored fabric drape. It provides a quiet background that lets the cupcakes pop. Avoid busy wallpapers or cluttered shelves unless they fit the theme perfectly. If you don’t have a wall (e.g., an island setup), try to ensure the view behind the display is tidy. A simple balloon garland arching over the table also frames the space beautifully without blocking the view.
How many cupcakes fit on a standard tiered stand?
Capacities vary, but a standard round 3-tier stand typically holds 12-16 standard cupcakes. A 4-tier stand usually holds 24-30. Always check the manufacturer’s description, but be skeptical of their maximum numbers—they often calculate based on cupcakes touching each other. For a styled look with breathing room, assume about 75% of the stated capacity.
Can I display cupcakes outside in summer?
You can, but it is risky. Buttercream begins to soften at 80°F and can melt completely at 85°F+. If you must be outside, keep the display in deep shade. Consider using a “crusting” buttercream recipe (with shortening) or a fondant topper which is more heat stable. A smart trick is to freeze the cupcakes and set them out frozen; they will thaw on the display while staying cool longer.
How do I transport a cupcake display?
Never transport a fully assembled display with cupcakes on it. It will fall over in the car. Transport the cupcakes in flat carriers or boxes with inserts (see Cupcake Toppers: Design Templates, DIY Tutorials & Theme Inspiration for transport tips). Pack the stands disassembled or in a separate box with padding. Assemble the stand at the venue first, then load the cupcakes. It takes more time, but it ensures everything arrives intact.


Leave a comment
You must be logged in to post a comment.