


When to Bake, How to Store, and Transporting Birthday Cakes Safely
We need to talk about the fear. You know the one I mean. It’s not the fear that the cake won’t rise or that the frosting will be too sweet. It’s a specific, gnawing anxiety that sets in the moment you put the final spatula of buttercream on a perfect birthday cake. When you realize that this beautiful, fragile, temperature-sensitive creation is currently sitting safely in your kitchen, but it needs to be somewhere else, likely hours from now, looking exactly like it does right now.
I have spent days planning a cake, shopping for specific ingredients, and carefully baking layers, only to watch the frosting slowly slide down the side during a twenty-minute car ride. I have seen condensation turn smooth fondant into a sticky mess because I didn’t understand how temperature shock works. The most beautiful cake in the world means absolutely nothing if it arrives at the venue looking like it survived an earthquake rather than a celebration.
These logistics—timing, storage, and transport—are often treated as afterthoughts in recipes. Most cookbooks give you the instructions to make the cake, but they leave you entirely on your own for the terrifying gap between “finished decorating” and “singing Happy Birthday.” That gap is where dreams die. It is where stale crumbs happen. It is where buttercream weeps and decorations shatter.
But it doesn’t have to be that way.
If you are reading this, you probably need your cake to arrive in perfect condition. Maybe you are baking for the first time and have no concept of how long cooling actually takes. Maybe you have baked before but had a near-miss that left you shaking, and you want to know how professionals transport tiered cakes without having a nervous breakdown. Or perhaps you are just trying to figure out if you can bake on Thursday for a Saturday party without serving stale dessert.
We covered the basics of choosing recipes and flavors in the main hub, Birthday Cakes and Cupcakes: The Complete Celebration Guide, but that post couldn’t hold the specific details you need for the logistics. This guide goes deeper. This is where we get into the nitty-gritty of baking timelines for every type of cake, the science of why birthday cake storage matters (it’s more than just plastic wrap), and the temperature management strategies that keep your frosting stable and your sanity intact.
You don’t need a refrigerated van or a professional kitchen to pull this off. You just need to know the physics of sugar and butter, and you need a plan that works backward from the party instead of forward from your free time. Let’s turn that anxiety into confidence.

When to Bake Your Birthday Cake: Complete Timeline Guide
The single biggest mistake I see home bakers make isn’t over-baking the cake or breaking the buttercream emulsion. It is underestimating the timeline. We tend to think of “making a cake” as one activity, but a decorated birthday cake is a construction project involving multiple phases: baking, cooling, settling, filling, crumb coating, chilling, and final decorating.
If you try to jam all of that into the morning of the party, you are setting yourself up for a warm, sliding, stressful disaster.
Working Backward from Party Time
Professional event planners and bakers never ask, “When should I start?” They ask, “When does it need to be done?” and they work backward. This shift in thinking changes everything.
Let’s look at a real scenario. Imagine the party starts at 2:00 PM on Saturday.
You might think you need the cake ready at 2:00 PM but you don’t. You need the cake fully decorated, boxed, and stable for transport at least one hour before you leave. If it’s a complex cake, maybe two hours. Let’s say noon on Saturday is your hard deadline.
Working backward from noon Saturday:
- 12:00 PM Saturday: Cake is boxed and chilling for transport stability.
- 9:00 AM Saturday: Final decorating begins. This gives you three hours for piping, placing decorations, and fixing mistakes.
- 8:00 PM Friday: Crumb coat applied. The cake then chills overnight. This seals in the crumbs and creates a firm foundation for your final layer of frosting.
- 6:00 PM Friday: Layers are filled and stacked.
- 4:00 PM Friday: Layers are leveled and prepared.
- Friday Morning (or Thursday Night): Baking happens.
Wait—baking on Thursday for a Saturday party? Yes. Absolutely. In fact, for many cakes, Thursday baking produces a better Saturday cake than Saturday baking does.
When you try to bake, cool, and frost in one day, you run into the enemy of structure: heat. If your cake layers are even slightly warm—even just in the very center—when you apply buttercream, the butter melts. The structure slides. The layers drift apart. By separating the baking from the decorating, you ensure your canvas is perfectly cool and stable.
Most people underestimate the cooling phase. A thick 8-inch cake layer takes hours to cool completely to the core. If you wrap it while it’s warm, you trap steam, which can make the cake gummy. If you frost it while it’s warm, you get the leaning Tower of Pisa. Give yourself the gift of time. Double your estimate for every step if you haven’t made this specific recipe before. It is always better to have a finished cake sitting happily in the fridge for an extra hour than to be frantically piping borders while guests are arriving.
Cake Type Affects Timeline
Not all cakes are created equal, and they don’t all age the same way. Understanding the specific staling profile of your cake type allows you to schedule your baking intelligently.
Butter Cakes and Standard Layer Cakes These are your classic vanilla birthdays, chocolate fudges, and funfetti cakes. Here is a secret: these cakes are often better the day after they are baked. The fat structure sets, the crumb becomes more tender, and the flavors meld. A butter cake fresh out of the oven can be crumbly and difficult to carve or stack. A butter cake that has rested for 12 to 24 hours is sturdy and moist. You can bake these layers one to two days before assembly if you wrap them well. This is the sweet spot for a stress-free timeline.
Sponge and Foam Cakes If you are making an Angel Food Cake, a Chiffon, or a Génoise, the rules change. These cakes rely on egg foam for structure and contain very little (or no) fat. Fat is a preservative; without it, these cakes stale rapidly. A sponge cake is at its absolute peak the day it is baked. By day two, it starts to dry out. By day three, it is noticeably stale. If your menu features a delicate sponge, your baking needs to happen closer to the event—likely the morning of or the night before at the earliest.
Cheesecakes Cheesecake is the ultimate make-ahead friend. A cheesecake effectively requires a 24-hour lead time. It needs to bake, cool slowly to room temperature, and then chill thoroughly in the refrigerator for at least 8 hours (preferably overnight) to achieve the right texture. If you rush a cheesecake, it will be soft and grainy. For a Saturday party, bake your cheesecake on Thursday. Let it chill all day Friday. Decorate Saturday morning. The texture will be creamy and perfect, and you won’t be stressing over the water bath on party day.
Pound Cakes and Dense Cakes High-sugar, high-fat cakes like pound cake or traditional fruit cake are the marathon runners of the dessert world. They don’t just survive time; they improve with it. A pound cake baked three days ago often tastes better than one baked today. The crust softens, and the moisture redistributes. You can bake these well in advance—sometimes weeks for fruitcakes—taking all the pressure off the final days.
Component Timing Strategies
A decorated cake isn’t a single object; it is an assembly of parts. Smart bakers separate these parts to manage the workload. You don’t have to do everything at once.
Make Ahead (Way Ahead)
- Fondant Decorations: These can (and often should) be made weeks in advance. Modeled figures, gum paste flowers, and cut-out shapes need time to dry and harden. Store them in a cardboard box (not plastic—they need to breathe) away from light and dust.
- Cake Layers: As mentioned, layers bake well 1-2 days out. But they also freeze beautifully for weeks. I often bake layers the weekend before a party, freeze them, and then move them to the fridge to thaw the night before decorating.
- Buttercream: You can make American or Swiss Meringue buttercream days in advance. Store it in the fridge. It actually allows the air bubbles to settle, giving you a smoother frosting later.
- Fillings: Curds and ganache can be made days ahead.
Make Close to Serving
- Whipped Cream: This is the most time-sensitive topping. Even stabilized whipped cream starts to lose volume and weep after 24 hours. Make this the day of the party.
- Fresh Fruit: Cut fruit weeps moisture. If you put sliced strawberries inside a cake on Thursday for a Saturday party, you will have soggy cake and mushy gray berries. Add fresh fruit during final assembly.
- Meringue Toppings: Unless it’s a stable Italian meringue, humidity will destroy crisp meringues quickly. Add them at the last minute.
The Assembly Timeline The assembly phase requires patience. Filling and stacking should happen with cool layers. Once stacked, do a crumb coat—a thin layer of frosting that traps stray crumbs. Then, stop. Put the cake in the fridge. Let that crumb coat set hard (about 30 minutes). This creates a “shell” that you can then frost over perfectly smoothly without dragging crumbs into your final design. This stop-and-start rhythm gives you better results than rushing through.
Emergency Timeline Adjustments
Sometimes, life happens. You planned to bake Thursday, but work ran late. Now it’s Friday night, the party is tomorrow, and you haven’t started ingredients prep.
First, breathe.
You cannot rush cooling. That is the one non-negotiable. If you frost a warm cake, you lose. However, you can speed up cooling. Instead of baking two thick 3-inch layers, bake four thin 1-inch layers. They will bake faster and cool in half the time. Spread them out on multiple racks. Get a fan moving air in the kitchen (but not directly on the cakes, or they will dry out).
If you are short on time, simplify the decoration. A simple rustic swirl or a “naked cake” look takes twenty minutes. A smooth-sided fondant covering takes hours of prep and application. Abandon the complex design in favor of something achievable. Fresh flowers (food safe ones!) on a simply frosted cake look elegant and take five minutes to arrange.
And here is the hardest truth: sometimes you should just buy the cake. If it is 2:00 AM, you are weeping into a bowl of broken ganache, and the party is at 10:00 AM, you are not doing the birthday person a favor by continuing. A happy host with a bakery cake is better than a miserable host with a homemade disaster. There is no shame in pivoting to Plan B to save the celebration vibe.
Birthday Cake Storage: What Happens and Why It Matters
We tend to think of birthday cake storage as simply keeping the cat away from the frosting, but there is actual chemistry happening on your counter. Understanding why cake goes stale helps you prevent it.
Understanding What Staling Actually Is
Staling is not just drying out. You can have a cake that is still moist but tastes stale. Staling is a process called retrogradation. This is where the starch molecules in the flour, which expanded and gelatinized during baking, begin to realign and crystallize back into a rigid structure. This makes the crumb feel tough, harsh, and dry, even if the water content hasn’t changed much.
Here is the counterintuitive part: this crystallization process happens fastest at cool temperatures—specifically, refrigerator temperatures (around 40°F).
When you put a loaf of bread or an unfrosted cake layer in the refrigerator to “keep it fresh,” you are actually accelerating the staling process. The cold environment pushes those starch molecules to crystallize much faster than they would at room temperature. This is why a slice of cake left in the fridge overnight often tastes distinctively “old” compared to one left in a box on the counter.
However, moisture loss is the other half of the equation. While the fridge accelerates staling, the air inside it is also very dry, which sucks moisture out of the cake. Fat (butter, oil, egg yolks) interferes with this process. This is why high-fat cakes stay fresh longer than lean cakes. It is also why we use simple syrup—brushing sugar syrup onto layers adds moisture that acts as a buffer against drying.
Frosting plays a heroic role here. It acts as a sealant. A fully frosted cake is essentially wrapped in a layer of fat and sugar that is impermeable to air. The cake inside a complete coating of buttercream is protected from moisture loss and, to some extent, the air exposure that drives staling.
Room Temperature Storage Guidelines
For many cakes, the kitchen counter is actually the best place for them. Room temperature (around 70°F) keeps the butter in the cake soft and the starch retrogradation slow.
When to Store at Room Temp:
- Standard Buttercream: Classic American buttercream, Swiss Meringue, and Italian Meringue are stable at room temperature for 2-3 days. The high sugar content creates an environment where bacteria struggle to grow.
- Fondant: Fondant hates the fridge. It thrives at room temperature.
- Ganache: Once set, ganache is shelf-stable for several days in cool conditions.
How to Do It Right: “Room temperature” means a cool, stable environment. It does not mean a sunbeam, and it does not mean a humid kitchen while you are boiling pasta. Sunlight is the enemy—it will melt frosting and fade colors. You need to cover the cake to protect it from dust, pet hair, and bugs. A cake dome is perfect. If you don’t have one, a large overturned mixing bowl works. If the cake is in a box, close the lid. You want air circulation to be minimal to prevent drying, but you don’t need an airtight seal for a frosted cake.
Watch for visual cues. If your buttercream starts to look darker or “crusty” at the edges, the air is too dry. If your fondant starts to look shiny or sticky, it’s too humid.
Refrigerator Storage Guidelines
Despite the science of staling, sometimes the refrigerator is unavoidable. Food safety always trumps texture.
When You MUST Refrigerate:
- Perishable Fillings: If you used pastry cream, custard, whipped cream, or a mousse made with raw eggs, the cake must be cold.
- Fresh Fruit: Any cake with fresh cut fruit inside or on top needs refrigeration.
- Cream Cheese Frosting: This is a gray area for some, but I stick to the safety rule: cream cheese is dairy. Refrigerate it.
- Hot Kitchens: If your house is 80°F, your butter cake will melt on the counter. The fridge is the lesser of two evils.
How to Minimize Damage: To store a cake in the fridge without ruining it, you need to protect it from the aggressive dry air and the smells of your leftovers. Birthday cake should not taste like last night’s lasagna.
- Chill Uncovered First: Put the cake in the fridge naked for about 30 minutes until the frosting is hard.
- Wrap or Box: Once the frosting is hard, you can loosely wrap the whole cake in plastic wrap (it won’t stick to the cold frosting) or, better yet, put it in a cake box and wrap the box in plastic wrap. This creates a micro-environment.
- The Wait: The most critical step is the return journey. Do not serve cold cake. Cold cake tastes dry and waxy because the butter is solid. You must take the cake out of the fridge 1-2 hours before serving to let it come back to room temperature. This allows the butter to soften and the flavor to bloom.
Freezer Storage Guidelines
If the fridge is the enemy of fresh cake, the freezer is its best friend. Freezing stops the starch molecules in their tracks. They don’t have time to crystallize.
Freezing Layers: I almost always freeze my cake layers, even if just for overnight. Wrap the completely cooled layer in plastic wrap, then a layer of foil. The plastic protects moisture; the foil protects against freezer burn. When you thaw them (leave them wrapped on the counter), the condensation forms on the foil, not the cake. The result is a incredibly moist cake.
Freezing Decorated Cakes: Yes, you can freeze a whole finished cake. I have done this for weddings. Flash freeze the decorated cake until the frosting is rock hard. Wrap it gently but thoroughly in plastic, then place it in a heavy-duty box. It can stay there for a month. To thaw, move the boxed cake to the fridge for 24 hours, then to the counter. It works miracles for planning ahead.
What NOT to Freeze:
- Custards/Puddings: They tend to separate and weep when thawed.
- Delicate Fondant Work: While possible, condensation often ruins the finish.
- Fresh Fruit: Strawberries turn to mush.
Storing Frosting and Fillings: Make-Ahead Strategies
One of my favorite tricks for reducing stress is separating the frosting making from the cake decorating. Standing over a mixer for twenty minutes while your back aches is not how you want to start a decorating session.
Buttercream Storage
Buttercream is resilient. You can make a huge batch of American or Meringue buttercream on Tuesday for a Saturday party.
Room Temp vs. Fridge: American buttercream can sit on the counter in an airtight container for a day or two. Swiss and Italian meringue buttercreams are safer in the fridge due to the egg content. They can stay refrigerated for two weeks easily.
The Re-Whipping Rule: This is where people panic. When you take buttercream out of the fridge, it will be hard as a rock. As it warms up, it might look curdled, separated, or “broken.” This is normal! It’s just the butter and liquid components coming to temperature at different rates. Do not throw it away. Let it reach full room temperature. Then, put it back in the mixer and whip it on medium-high. It will look terrible for a minute—sloshy and chunky—and then, like magic, it will come back together into a smooth, fluffy cloud. You cannot skip the re-whipping step. If you try to frost a cake with cold or separated buttercream, you will tear the cake.
Cream Cheese Frosting and Whipped Cream
Cream Cheese: This frosting is softer and less structural than buttercream. It stores well in the fridge for a week. However, unlike buttercream, you don’t want it to get too warm, or it becomes soupy. I like to use cream cheese frosting while it is still slightly cool—not cold and hard, but chilled enough to hold its shape.
Whipped Cream: I will be honest with you: whipped cream is a diva. It wants to be made and eaten immediately. If you need to make it ahead, you must stabilize it.
- Gelatin Hack: Bloom 1 teaspoon of unflavored gelatin in 4 teaspoons of cold water, then melt it gently. Drizzle this into your cream as you whip it. It will hold for 24-48 hours without weeping.
- Pudding Hack: Add a tablespoon of instant vanilla pudding mix to the cream. It adds stability and flavor. Even with these hacks, keep whipped cream toppings refrigerated until the last possible second.
Filling Storage Considerations
What you put inside the cake dictates the storage of the whole cake.
Curds and Jams: Lemon or fruit curds are wonderful, but they are wet. If you make a cake with lemon curd filling three days in advance, the acid and moisture will soak into the cake layers, creating a soggy line. I call this “filling bleed.” If you use wet fillings, assemble the cake no more than 24 hours before serving. You can pipe a “dam” of buttercream around the edge of the layer to keep the curd from leaking out the sides.
Mousse and Pastry Cream: These fillings need structure time. If you fill a cake with chocolate mousse and try to transport it immediately, the layers might slide because the mousse hasn’t set. Assemble mousse-filled cakes, then chill the whole cake for at least 4 hours to let the filling firm up. This creates a solid structural unit that is much safer to move.
Temperature Control for Birthday Cake Quality
Temperature is the invisible ingredient in your cake. It controls texture, stability, and structure. Ignoring it is the fastest way to disaster.
Understanding Temperature’s Effect on Frosting
Every frosting has a “failure point”—a temperature where it loses its will to live.
- Butter: Butter melts around 90-95°F, but it gets soft and structural weak around 80°F. If your party is outdoors in July, a butter-based cake is a ticking time bomb.
- Ganache: Dark chocolate ganache has a higher melting point than butter. It is your best friend for summer parties. It stays firm even when the weather is warm. White chocolate ganache, however, melts much faster.
- Fondant: Fondant doesn’t melt in heat so much as it “wilts” in humidity. It contains gums that absorb moisture from the air. In a hot, humid environment, fondant becomes sticky and can stretch, causing the “elephant skin” look or sagging down the cake.
If you are decorating in a hot kitchen, you need to manage the temperature of the frosting while you work. If the piping bag gets hot in your hand, put it in the fridge for five minutes & if the cake starts to feel soft, stop and chill it. Push through the heat, and you will end up with a mess.
Managing Temperature Transitions
The most dangerous moment for a cake is when it moves from one environment to another.
The Condensation Issue: When you take a cold cake out into a warm room, water from the air condenses on the cold surface. On buttercream, this looks like little beads of sweat. It’s usually fine—just don’t touch it. Let it evaporate naturally. On fondant, condensation is a problem. Water dissolves sugar. If you touch wet fondant, you will leave a permanent fingerprint. If you have painted on the fondant, the colors will run.
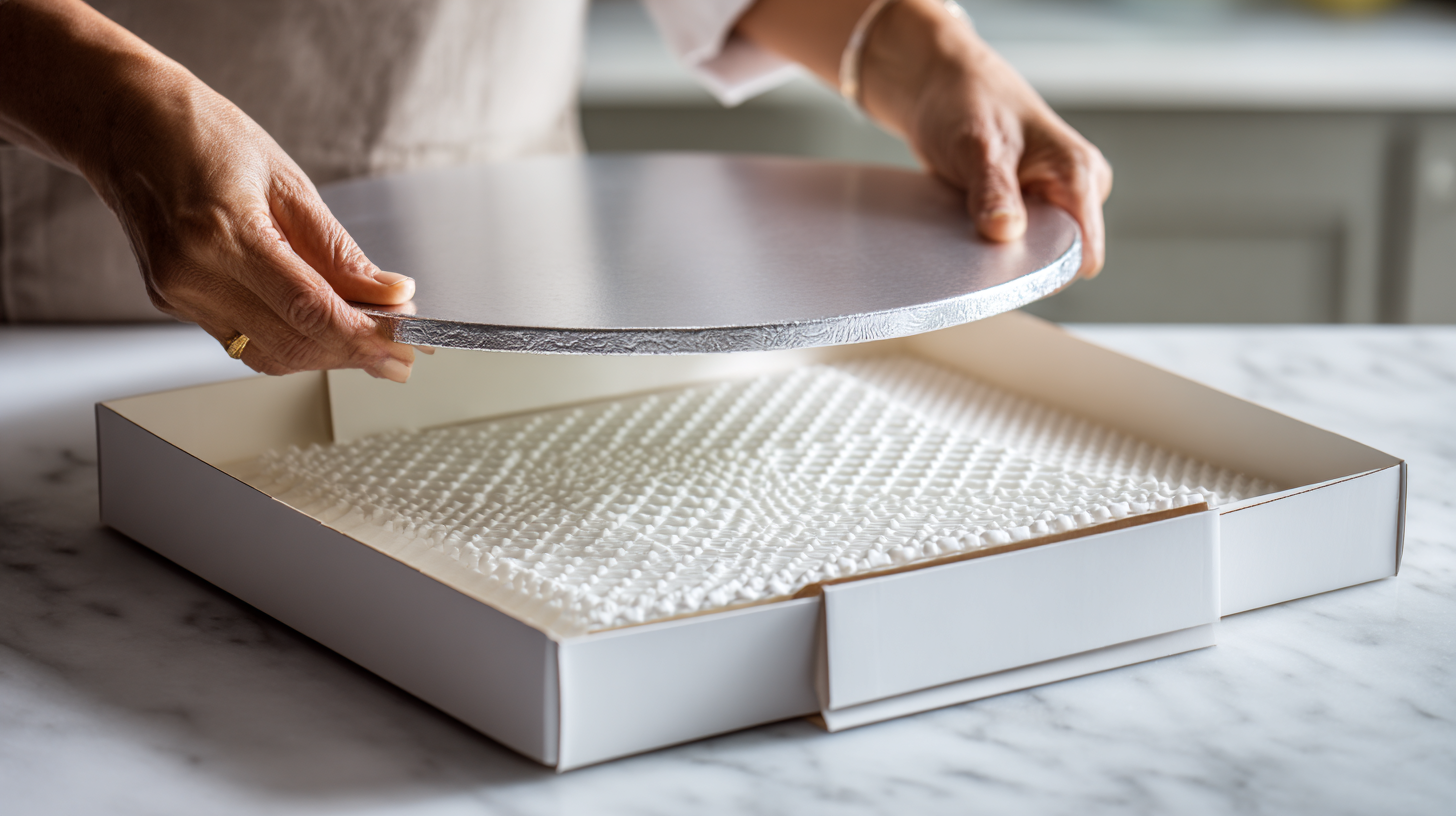
- The Fix: If you must refrigerate a fondant cake, box it. When you take the box out, do not open it until the box feels like it is room temperature. The condensation will form on the cardboard box, not the cake inside.
Transport Temps: Transporting birthday cake safely means controlling the car environment.
- AC is Mandatory: In summer, cool the car down for ten minutes before you load the cake.
- No Sun: Never put a cake on a car seat where the sun hits it. Even with AC on, direct sun through glass will melt frosting in minutes.
- The Cooler Trick: For long trips, or if you don’t have good AC, use a large cooler. You don’t even need ice (which can cause condensation). Just the insulation of the cooler protects the cake from the rapid temperature swings of the car ride.
Transporting Birthday Cake: Essential Strategies for Safe Delivery
Transporting Birthday Cake: Essential Strategies for Safe Delivery
The baking is done. The decorating is finished. The kitchen smells like vanilla and triumph. Now comes the part that makes even seasoned professionals hold their breath: moving the cake.
Transporting cake is the final boss of the baking process. You have created something structurally delicate, temperature-sensitive, and top-heavy, and now you need to move it through a world full of potholes, sudden stops, and humidity. I have seen beautiful cakes ruined not by bad recipes, but by bad driving and poor planning.
But I have also transported three-tier wedding cakes across state lines in a Honda Civic without a single smudge.
The secret isn’t a refrigerated van or expensive equipment. It is preparation. Safe transport starts long before you pick up the keys. It starts with how you prepare the cake, how you rig your car, and how you drive. Let’s turn that anxiety into a logistical plan that works.
Preparing the Cake for Transport
Do not just grab the cake stand and walk out the door. A cake that is properly prepped for travel survives bumps that would destroy an unprepared cake.
The Chill Rule This is the single most important rule in cake transport: Cold cake travels best. If you take nothing else from this guide, take this: birthday cake storage prior to travel must involve the refrigerator. You need to chill your finished cake for at least one to two hours before it goes into the car. Longer is better.
Why? Because cold buttercream is hard. It acts like a helmet for your cake. At room temperature, buttercream is soft and susceptible to every vibration. If you hit a bump, soft frosting ripples or decorations slide. If the frosting is cold and hard, the cake moves as one solid unit. I never, ever transport a room-temperature cake if I can avoid it. Even if the venue is only ten minutes away, that chill time buys you insurance against every turn and stoplight.
Structural Security Gravity is not your friend during transport. If you are moving a cake that is taller than it is wide, or any cake with multiple tiers, you need internal support.
- Dowels: For tiered cakes, a central wooden dowel driven through the entire cake and into the bottom board anchors the tiers together. Without it, a sudden stop can send the top tier sliding right off the bottom one.
- The Board: Your cake must be on a sturdy cake board or drum that is at least two inches wider than the cake. This gives you room to pick it up without your thumbs digging into the frosting.
- The Anchor: The cake board must not slide. I place a small piece of non-slip shelf liner (the rubbery mesh kind used for drawers) between the cake board and the transport container. It works better than tape and prevents that terrifying slow-motion slide when you turn a corner.
Choosing and Preparing Your Transport Container
Holding the cake in your lap is not a strategy. It is a disaster waiting to happen. Your body heat warms the cake, your hands can’t compensate for car movement as well as you think, and in an accident, the cake becomes a projectile. You need a container.
Carriers and Boxes If you bake often, a dedicated cake carrier with a locking lid is a worthy investment. The locking mechanism ensures the lid doesn’t fly off, and the sturdy base handles the weight. However, ensure the carrier is the right size. A small cake sliding around inside a giant carrier is dangerous.
Bakery boxes are excellent for transporting cake because they are designed for the job. You can buy heavy-duty corrugated cardboard cake boxes online or at craft stores.
- The Fit: The box should be the exact size of your cake board. If you have a 10-inch cake on a 12-inch board, you need a 12-inch box. This prevents the board from shifting inside the box.
- Security: Tape the sides of the box. I have seen box tabs pop open during transport, compromising the structure. A little tape gives you peace of mind.
Improvised Solutions You don’t need professional gear. I have successfully transported dozens of cakes using items you likely have.
- The Roasting Pan Method: Place the cake (on its board) inside a large, high-sided roasting pan. The sides protect the cake from falling objects, and the sturdy handles make carrying easy. Just ensure you use a non-slip mat under the board so it doesn’t slide around the metal pan.
- The Cooler Method: A large cooler is fantastic for cake storage during transit, even without ice. The thick insulation protects the cake from temperature spikes and physical bumps. Place the cake inside, pad any empty space with rolled-up towels to prevent shifting, and you have a thermal safe room for your dessert.
Anti-Slide Tactics Regardless of the container, the cardinal rule is immobilization.
- Inside the Box: Use a loop of masking tape or a dab of glucose/corn syrup to stick the cake board to the bottom of the box.
- Outside the Box: The box itself must not slide. That roll of rubbery shelf liner is my MVP. I keep a roll in my car specifically for cake deliveries. A square of that under the box keeps it glued to the car floor.
Vehicle Preparation and Positioning
Your car is not just a vehicle; it is a mobile walk-in cooler. Treat it that way.
Temperature Management Never put a cake in a hot car. In the summer, I go out to the driveway fifteen minutes early and blast the air conditioning. I want the interior to feel like a refrigerator before the cake ever leaves the house.
- Summer: AC on max. Cool the upholstery, not just the air.
- Winter: This is actually easier. If it’s cold outside, your car is a natural fridge. However, don’t blast the heat. I drive in a coat and hat so I can keep the car interior cool (around 65°F) for the cake’s sake. Direct heat from floor vents can melt the bottom of a buttercream cake surprisingly fast.
Placement: The Floor is King Where do you put the cake? Not on the seat. Car seats are slanted backward to be comfortable for human hips. They are terrible for flat cakes. A cake on a seat will tilt, causing layers to slide or fillings to leak.
The safest place for transporting cake is the flat floorboard of the vehicle.
- Front Passenger Floor: This is good because you can keep an eye on it, and the AC vents are usually powerful there. Push the seat back to make room.
- Back Seat Floor: This is often the flattest and most stable spot, shielded from direct sun.
- The Trunk: Use this only as a last resort. Trunks can get hot, you can’t see the cake, and the suspension is often bouncier over the rear axle. If you must use the trunk, ensure it is clean and secure the cake relentlessly.
Securing the Cargo Once the cake is on the floor (on its non-slip mat), wedge it in. I keep a “cake transport kit” in my trunk that includes rolled-up yoga mats and thick towels. I pack these around the cake box so it is physically impossible for the box to tip or slide. Push the front seat back until it gently touches the box (if on the back floor) or pack gear around it. The cake should be part of the car’s structure, not loose cargo.
Driving Strategies for Cake Safety
You have secured the package. Now you have to drive. Driving with a cake requires a different mindset.
The “Cup of Water” Theory Imagine there is an open cup of water filled to the very brim sitting on your dashboard. You need to drive in a way that doesn’t spill a single drop.
- Acceleration: Press the gas pedal as if there is an egg under your foot. Smooth, gradual increase in speed.
- Braking: This is where disasters happen. Leave double the normal following distance. You want to coast to a stop, not brake. A hard brake sends the cake flying forward, slamming into the front of the box.
- Turns: Take corners at half your normal speed. Centrifugal force pulls the cake layers sideways. If you take a sharp right turn, your top tier wants to keep going straight. Turn like you are driving a limousine.
Route Planning The fastest route is rarely the best route. I will happily drive five extra miles to avoid a road I know has potholes or speed bumps. Speed bumps are cake enemies. If you must go over them, crawl. Literally crawl. Avoid steep hills if you can. Going up a steep hill tilts the cake backward; going down tilts it forward. Check traffic. Stop-and-go traffic is worse than steady highway driving because of the constant inertia shifts. Leave early—rushing leads to hard braking, and hard braking leads to cake wrecks.
Preventing Cake Damage and Emergency Repairs During Transport
Even with perfect preparation, things happen. A deer runs out, someone cuts you off, or you hit a pothole that wasn’t there yesterday. Panic is the enemy. Preparation is the cure.
Common Transport Damage and Prevention
Knowing what goes wrong helps you spot it before it becomes catastrophic.
The Slide
- What it looks like: The top tier is no longer centered on the bottom tier, or the whole cake has shifted and smeared against the side of the box.
- Why it happens: Taking turns too fast, lack of internal dowels, or the cake wasn’t cold enough.
- The Fix: If it’s structural, you need to stop. If a tier is sliding off, you might need to gently push it back (with clean hands!) and re-secure. If it’s just a smear, wait until the venue.
The Melt
- What it looks like: Buttercream is shiny and drooping. Borders are losing definition.
- Why it happens: The car was too hot or the cake sat in direct sunlight.
- The Fix: Blast the AC. Get it to the venue immediately and into a refrigerator. Do not touch soft frosting—you will only make it worse. Let it firm up in the fridge before attempting any repairs.
The Crack
- What it looks like: A hairline fracture in the buttercream or fondant.
- Why it happens: Vibration from the road or the cake board flexing.
- The Fix: This is cosmetic and easily fixed at the venue with your repair kit.
The Emergency Repair Kit
I never transport a cake without a repair kit. It lives in a gallon Ziploc bag in my car. Knowing it is there lowers my blood pressure.
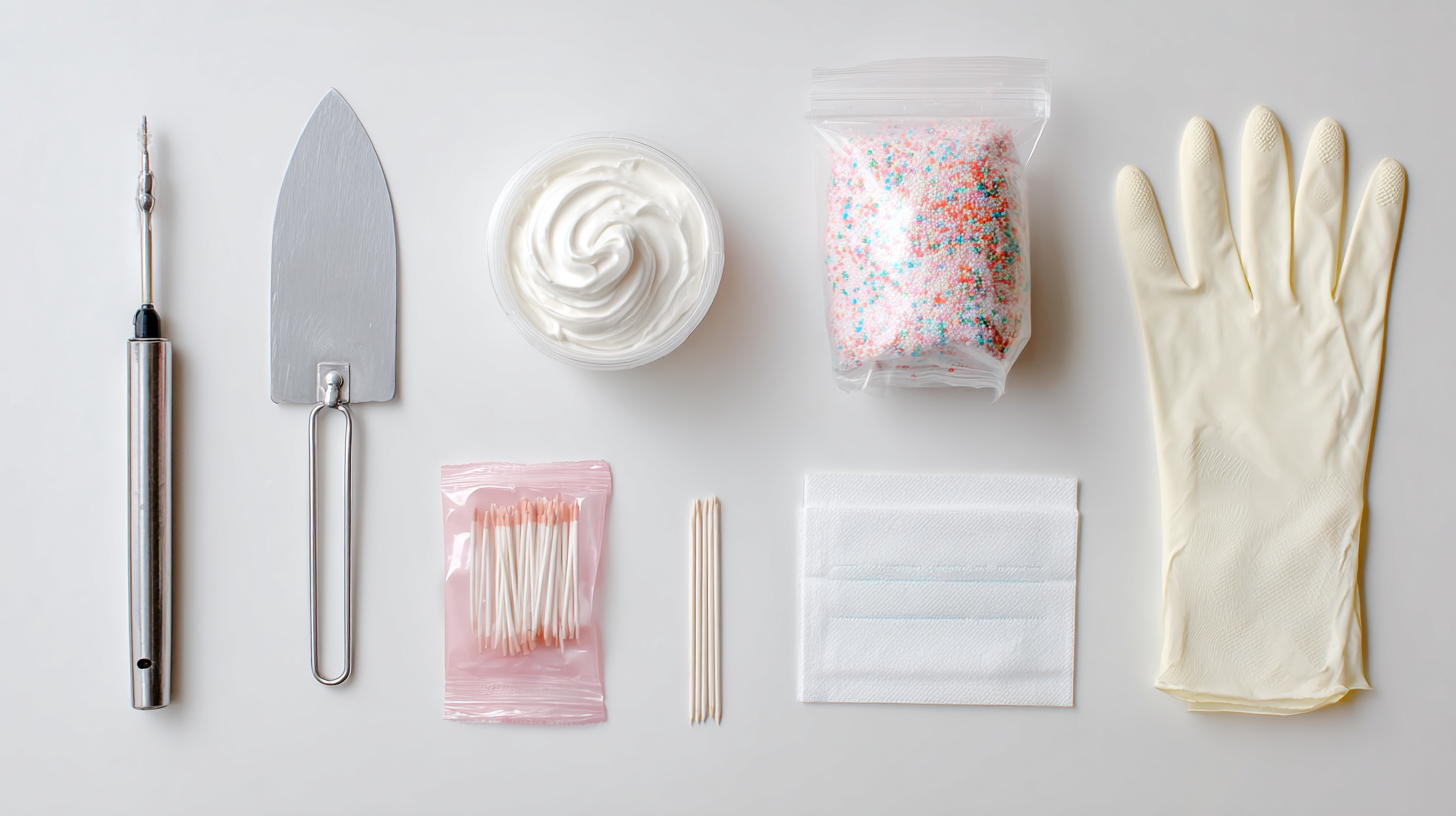
What to Pack:
- Extra Frosting: A small container of the frosting color(s) you used. Even half a cup can save the day.
- Small Offset Spatula: For smoothing smudges.
- Piping Bag and Tip: If you have piped borders, bring a bag with the tip already in it. You can fill it with the extra frosting if needed.
- Toothpicks/Skewers: Great for maneuvering shifted decorations without using your fingers.
- Paper Towels: For wiping the board clean.
- Extra Decorations: A few extra sprinkles, sugar flowers, or candies. If a side gets smashed, guess what? That’s where a flower cluster goes now.
- Gloves/Wet Wipes: To keep your hands clean.
The Mindset of Repair When you arrive and open the box, if you see damage, stop. Don’t gasp. Don’t apologize yet. Assess. Most damage is fixable. A smear on the side? Smooth it over. A dent in the fondant? Cover it with a decoration. A tier that shifted slightly? Turn the cake so that side faces the wall. Your guests don’t know what the cake was supposed to look like. They only see what is there. If you cover a mistake with a flower, they just think the design includes a flower there.
Arrival and Setup Protocols
You have arrived. The engine is off. Do not relax yet. The “last mile” is often where drops happen.
The Unload Scout the path first. Is the door locked? Is there a rug that slips? Are there stairs? Do not carry the cake until you know exactly where it is going. When you lift the box, lift from the bottom. Never grab the sides—you might squeeze the box into the frosting. Keep the box level.
Temperature Transition Get the cake out of the heat immediately. If you are at the venue early, ask for fridge space. If the cake is buttercream and the party starts in an hour, place it on the display table. This is the perfect time for it to come to room temperature for eating. Cake storage at the venue is just as important as at home. Don’t place the cake table in front of a sunny window or under a heat vent.
Final Inspection Once the cake is out of the box and on the stand, do your touch-ups. Smooth any fingerprints. Wipe the board. Add the candles. This is the moment to breathe. You did it.
Transporting Birthday Cakes in Challenging Situations
Sometimes the logistics are not straightforward. Here is how to handle the curveballs.
Long-Distance Transport
If you are driving more than an hour, the rules tighten.
- Active Cooling: You need a cooler. For large cakes that don’t fit in standard coolers, I use a “cool box” method. I place frozen gel packs (wrapped in towels so they don’t sweat on the cake) in the corners of the transport box. It creates a mini-fridge environment.
- Rest Stops: Check the cake every hour. It gives you a chance to spot sliding or melting before it becomes unrecoverable.
- Disassembly: For very long trips (3+ hours) with tiered cakes, I transport the tiers in separate boxes and stack them at the venue. It takes ten minutes to assemble on-site, but it saves hours of stress on the road.
Outdoor Event Transport
Outdoor parties are lovely. They are also hostile environments for cake.
- The Heat: If it is 85°F, your butter cake has a lifespan of about 30 minutes before it starts to sweat and lean. Keep the cake indoors or in a cooler until the absolute last moment—usually right before the “Happy Birthday” song.
- The Terrain: Grass is not level. Picnic tables are not level. Bring some shims (cardboard coasters work well) to level the cake stand. A leaning cake on a hot day is a disaster waiting to happen.
- The Elements: Wind blows dirt. Flies love sugar. If the cake must sit out, invest in a mesh food cover or a large glass dome. It protects the hygiene and the aesthetic.
Commercial Transport and Bakery Pickup
Maybe you didn’t bake the cake. You just have to get the bakery order home safely.
- Inspect at Pickup: Open the box before you leave the counter. If there is damage, they can fix it there. Once you walk out the door, it is your problem.
- Listen to the Pros: If the baker says “keep this flat” or “refrigerate immediately,” do it. They know the structural integrity of their specific recipe.
- Check Your Vehicle: Bakeries often use large boxes. Ensure your car is clean and has flat space before you pick up. Trying to clear gym bags off the back seat while holding a 12-inch cake box is a struggle you don’t need.
Transporting Specialty Cakes
Tiered Cakes I’ve mentioned this, but it bears repeating: Separate tiers are safe tiers. If you are new to this, do not try to transport a three-tier cake fully assembled. Box them separately. Stack them there. Bring a little extra frosting to fill the seam between tiers.
Fondant Cakes Fondant is sturdy, but it hates humidity. If it’s raining, cover the box with a trash bag while walking to the car. A single raindrop on fondant leaves a permanent spot.
Ice Cream Cakes This is a different beast entirely. Transporting cake made of ice cream requires a high-quality cooler and dry ice or serious ice packs. You are not transporting a cake; you are transporting frozen goods. Wrap the cake box in towels for extra insulation inside the cooler. You have zero margin for error with melting here.
Delivering Your Birthday Cake in Perfect Condition
We have covered a lot of logistics, from the chemistry of staling to the physics of car suspension. It might seem overwhelming, but remember why you are doing this.
You are not just transporting sugar and flour. You are transporting a memory.
The moment the candles are lit and the face of the birthday person lights up—that is the destination. All this planning, the chilling, the driving like a grandma, the non-slip mats—it is all so that moment can happen without stress.
You now have the knowledge that professional caterers use where you know that cake storage is a science, and transporting cake is an art. You know that a cold cake is a safe cake, and that a repair kit is better than a panic attack.
If you are nervous, do a practice run. Next time you make a simple cake for Sunday dinner, box it up and drive it around the block. Feel how it moves. Test your car spots. Build your confidence when the stakes are low.
And remember: perfection is a myth. If your cake has a tiny smudge on the back or the border isn’t mathematically perfect, no one cares. They care that you made it & that it tastes good. They care that you are there to celebrate with them.
You’ve got this. Drive safe, stay cool, and let them eat cake.
Frequently Asked Questions About Birthday Cake Storage and Transport
How far in advance can I bake a birthday cake?
You have more time than you think! For standard butter cakes (vanilla, chocolate), you can bake layers 1-2 days ahead and store them wrapped at room temperature, or freeze them for up to 3 months. Sponge cakes are more delicate and should be baked within 24 hours of serving. Cheesecakes actually need to be made 3-4 days ahead to set properly. I often bake my layers on Thursday for a Saturday party to reduce stress.
Should I refrigerate a buttercream cake?
It depends on the filling and the timeline. A standard buttercream cake without perishable fillings (like fruit or custard) can safely sit at room temperature (70°F) for 2-3 days. In fact, it tastes better at room temperature! However, you should refrigerate it if your kitchen is hot, if it contains cream cheese frosting, or specifically to firm it up before transport. Always bring it back to room temperature 1-2 hours before serving.
How do I transport a tiered cake safely?
The absolute safest way is to transport the tiers in separate boxes and stack them at the venue. This removes the risk of toppling. If you must transport it assembled, you need a central wooden dowel driven through all tiers into the base board to anchor it. Chill the cake until it is rock hard, place it on a non-slip mat on the floor of the car, and drive extremely gently.
What should I do if my cake gets damaged during transport?
First, breathe. Most damage is cosmetic. If you have a smudge, smooth it with a spatula or knife and if a decoration falls off, stick it back on. If the damage is ugly, cover it! Turn the cake so the bad side faces the wall, or pile extra flowers/toppers over the dent. A “clean” simple cake looks better than a messy elaborate one, so don’t be afraid to remove damaged decorations entirely if they can’t be fixed.
Can I transport a cake in the trunk of my car?
I strongly advise against it. Trunks are often the hottest part of the car in summer (no AC airflow) and the coldest in winter. You also can’t see the cake to know if it’s sliding. Plus, the trunk sits over the rear axle, meaning it feels every bump more intensely than the center of the car. The floor of the back seat is much safer.
How long can a decorated cake sit out at a party?
For food safety, cakes with perishable ingredients (cream cheese, whipped cream, custard, fresh fruit) should not be out of the fridge for more than 2 hours. Standard buttercream and fondant cakes are safe at room temperature for several days, but quality matters. In a hot room or outdoors, buttercream can melt in 30 minutes. Keep the cake in a cool spot away from direct sunlight until you are ready to display it.


Leave a comment
You must be logged in to post a comment.